
Best Flours for Sourdough Starter Maintenance
Table of Contents
- Why Flour Choice Matters for Your Sourdough Starter
-
What Flour to Feed Sourdough Starter: Seven Options Compared
- How We Compared These Seven Flours
- All-Purpose Flour: The Reliable Beginner Choice
- Bread Flour vs All-Purpose Flour for Sourdough Starter
- Whole Wheat Flour: Boosting Fermentation Activity
- Rye Flour: The Fermentation Accelerator
- Unbleached Flour: A Natural Alternative
- Organic Flour: Nutrient-Rich Feeding
- Spelt and Ancient Grain Flours: Specialty Options
- Cost Per Feeding: What Each Flour Actually Costs You
- Which of the Seven Should You Actually Use?
- Sourdough Starter Feeding Ratio: Getting It Right
- How Often to Feed Sourdough Starter: Maintenance Schedule
- Switching Flours: Adjustments and Troubleshooting
- Common Flour-Related Mistakes Beginners Make
- Frequently Asked Questions
Last Updated: October 13, 2026
Why Flour Choice Matters for Your Sourdough Starter
The flours for sourdough starter you choose shape how fast it rises, how strong it becomes, and how your bread tastes. Different flours feed your starter differently, protein content, bran levels, and nutrient density all play a role. We've watched home bakers transform their starters by switching flours. Your starter needs the right balance of nutrients and protein to keep wild yeast and bacteria thriving.
What Flour to Feed Sourdough Starter: Seven Options Compared
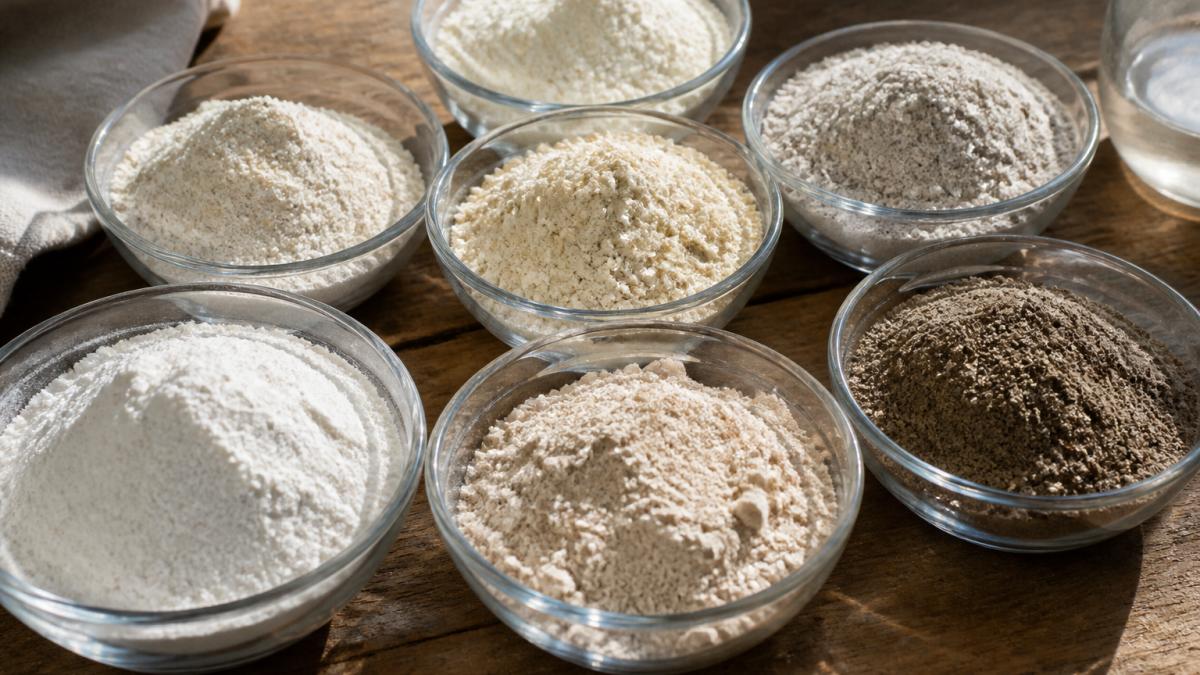
Choosing the right flours for sourdough starter maintenance means knowing what each type brings. Here are seven flours that work well for ongoing feeding.
| Flour Type | Protein Content | Fermentation Speed | Best For | Cost |
|---|---|---|---|---|
| All-Purpose | 10-12% | Moderate | Beginners, routine feeding | Most affordable |
| Bread Flour | 12-14% | Moderate | Building strength | Mid-range |
| Whole Wheat | 13-14% | Fast | Boosting activity | Mid-range |
| Rye | 8-10% | Very fast | Quick fermentation | Mid-range |
| Unbleached | 10-12% | Moderate | Natural preference | Slightly higher |
| Organic | 10-14% | Varies | Nutrient focus | Higher |
| Spelt/Ancient Grains | 14-15% | Moderate | Specialty bakers | Highest |
How We Compared These Seven Flours
We ran a controlled side-by-side comparison: one mature starter split into seven equal jars, each fed the same 1:1:1 ratio by weight, the same filtered water, and the same room temperature (about 70°F), tracking rise, aroma, and peak time over five daily feedings. The results below reflect what actually happens when you maintain a starter.
All-Purpose Flour: The Reliable Beginner Choice
All-purpose flour is your safe starting point, with enough protein (10-12%) to support fermentation without overwhelming a young starter. It produced repeatable results: peak rise at roughly 4-6 hours at 70°F, a mild yogurt-like aroma, and no surprises across five feedings. It's affordable and everywhere, which matters for beginners. The catch: it lacks the bran and germ of whole grains, so it offers no nutrient boost if your starter feels sluggish.
Bread Flour vs All-Purpose Flour for Sourdough Starter
Bread flour typically contains 12-14% protein versus all-purpose's 10-12%, so it feeds your starter more aggressively. It peaked about 30-60 minutes earlier and produced a firmer, more elastic starter. Use it to build strength or wake up a sluggish starter; for daily maintenance, all-purpose does the job at a lower cost.
Whole Wheat Flour: Boosting Fermentation Activity
Whole wheat flour wakes up a sleepy starter fast, its bran and germ contain nutrients wild yeast and bacteria love. A 100% whole wheat feeding peaked in about 3-4 hours, noticeably faster than all-purpose. Many bakers mix 20-30% whole wheat with 70-80% all-purpose for a boost without overdoing it. It absorbs more water, so add 5-10 grams of extra water per 50 grams of whole wheat flour and adjust by feel.
Rye Flour: The Fermentation Accelerator
Rye is the speed demon of sourdough flours. Dark rye especially contains compounds that accelerate fermentation: a 20% rye blend peaked roughly an hour earlier than 100% all-purpose, and 100% rye peaked fastest of all seven jars, but also collapsed quickest. It adds a subtle earthy note that carries into your bread.
Unbleached Flour: A Natural Alternative
Unbleached flour is all-purpose or bread flour that hasn't been chemically whitened. It ferments a touch faster than bleached all-purpose, under 30 minutes to peak, but consistently more bubbling. Nutritionally they're similar, so the real value is avoiding chemical processing. Cost runs slightly higher, but not dramatically.
Organic Flour: Nutrient-Rich Feeding
Organic flour means no synthetic pesticides or fertilizers, but the practical difference is modest, organic and conventional all-purpose performed nearly identically, peaking within about 15 minutes of each other. Choose it if you're sensitive to pesticide residue or committed to organic ingredients. It costs more, and conventional flour works fine for routine maintenance.
Spelt and Ancient Grain Flours: Specialty Options
Spelt, einkorn, and other ancient grains have higher protein (often 14-15%) and different gluten structures. Spelt ferments quickly and adds distinctive flavor, but it peaked in 3-4 hours and produced a looser, wetter starter because its gluten is more extensible. These flours cost more and are less predictable. Start with 20-30% spelt mixed with your regular flour before committing fully.
Cost Per Feeding: What Each Flour Actually Costs You
Starter maintenance is a recurring expense. Here's a rough cost comparison based on typical 5-pound bag prices, assuming a 50-gram feeding once per day. For current pricing, please check with your local retailers.
| Flour | Typical 5-lb Bag Price | Cost Per 50g Feeding | Cost Per Year (Daily Feeding) |
|---|---|---|---|
| All-Purpose | $3-$5 | About $0.07-$0.11 | About $25-$40 |
| Bread Flour | $5-$7 | About $0.11-$0.15 | About $40-$55 |
| Whole Wheat | $5-$7 | About $0.11-$0.15 | About $40-$55 |
| Rye | $6-$9 | About $0.13-$0.20 | About $48-$73 |
| Unbleached | $5-$7 | About $0.11-$0.15 | About $40-$55 |
| Organic | $7-$10 | About $0.15-$0.22 | About $55-$80 |
| Spelt/Ancient | $9-$14 | About $0.20-$0.31 | About $73-$113 |
A practical takeaway: daily all-purpose feedings with a 20% rye or whole wheat boost can be a cost-effective approach. Switching entirely to specialty flours may increase costs without a proportional gain in performance.
Which of the Seven Should You Actually Use?
If you want one answer: all-purpose or bread flour for daily maintenance, plus a 10-30% whole wheat or rye addition for more activity. Unbleached is a fine swap. Organic is a values choice, not a performance upgrade. Spelt and ancient grains are for bakers who plan to bake with them.
USDA organic certification standards
Sourdough Starter Feeding Ratio: Getting It Right
Your feeding ratio is the relationship between starter, flour, and water. Most bakers use 1:1:1, equal parts by weight. If you have 50 grams of starter, feed it 50 grams of flour and 50 grams of water.
Some bakers adjust the ratio based on their goals:
- For faster fermentation: use 1:2:2 (more flour and water relative to starter)
- For slower fermentation: use 1:0.5:0.5 (less flour and water, more starter)
- For thicker consistency: reduce water slightly
The flour you choose affects how these ratios work: whole wheat and rye ferment faster, so you might reduce the feeding amount, while all-purpose and bread flour are predictable with standard ratios.
How Often to Feed Sourdough Starter: Maintenance Schedule
How often you feed depends on kitchen temperature. At around 70°F, most starters thrive on once-daily feeding. Warmer kitchens (75°F+) may need twice-daily feeding, watch for overflow or a sour smell. Cooler kitchens (below 65°F) can stretch to every other day. If you bake regularly, feed 4-8 hours before mixing dough for peak activity.
Switching Flours: Adjustments and Troubleshooting
Switching flours mid-routine requires a transition period, since your starter's bacteria and yeast need time to adjust. The real work is diagnosing what changes and fixing it with the right flour-based adjustment.
The Gradual Transition Method
Mix your new flour with your old one: 25% new for 2-3 feedings, then 50/50 for 2-3 feedings, then 100% new. This gradual shift prevents shock. Slight changes in fermentation during the transition are normal.
Flour-Specific Troubleshooting
Most starter problems after a flour switch fall into four categories. Here's each one and its flour-based fix.
Problem: Slow activity after switching.
Problem: Starter is too runny.
Problem: Starter is too stiff.
A stiff, paste-like starter usually means the new flour absorbs more water, typical when moving to whole wheat, rye, or high-protein bread flour.
Problem: Aroma shifted from pleasantly sour to sharp, acetone-like, or yeasty.
A sharp or solvent-like smell signals the starter is hungry, it peaked and ran out of food.
Adjusting Hydration When You Switch
Whole wheat and rye absorb more water; spelt and ancient grains absorb less. Keep the flour weight fixed at your usual feeding amount, then adjust water to hit your target consistency, this keeps the ratio stable while compensating for absorption differences.
Adjusting Your Feeding Schedule When You Switch
Faster-fermenting flours (rye, whole wheat, spelt) can push your starter to peak in 3-4 hours instead of 5-6, leaving it hungry for hours on a once-daily schedule. Feed more often, or increase the ratio, a 1:2:2 or 1:3:3 feeding with a fast flour often peaks at the same time as 1:1:1 with all-purpose.
Keeping Notes Through the Transition
Record the flour, ratio, water amount, room temperature, and time to peak for each feeding during a switch. After two weeks you'll have a personal record of how your starter responds to each flour, more useful than any general guide, because your kitchen, water, and starter are unique.
USDA food safety guidance on flour storage
Common Flour-Related Mistakes Beginners Make
The most common mistake is feeding with inconsistent flour, switching brands or types every few feedings confuses your starter's rhythm.
Other common mistakes: using flour that's been open for months (it oxidizes and loses potency), and overfeeding or underfeeding based on appearance.
Heavily chlorinated tap water can slow fermentation, let it sit overnight or use filtered water.
Frequently Asked Questions
What type of flour should I use to feed my sourdough starter?
All-purpose flour is the most reliable choice for beginners and ongoing maintenance of a sourdough starter. It provides consistent fermentation without overwhelming your culture. Bread flour works well if you want faster activity due to higher protein content. Whole wheat and rye flours accelerate fermentation but should be used in smaller amounts (10-25% of total flour) to avoid overpowering the starter. Unbleached and organic options are excellent if you prefer avoiding chemical processing, though they ferment similarly to standard all-purpose flour.
Can I switch the flour I use to feed my sourdough starter?
Yes, you can switch flours, but do it gradually. Your starter's microbial community adapts to the nutrients and structure of the flour you use regularly. When changing flours, transition over 3-4 feedings by mixing the new flour with your current one, increasing the proportion of the new flour each time. Monitor your starter's rise time and bubble activity during the transition, you may notice a temporary slowdown before it adjusts. This approach prevents shocking your culture and keeps it active.
How often should I feed a sourdough starter?
Feed your sourdough starter once daily if you keep it at room temperature (68-72°F). Use a 1:1:1 feeding ratio (equal parts starter, flour, and water by weight) as a standard. If your kitchen is warmer, your starter may need feeding twice daily because fermentation speeds up. If you store your starter in the refrigerator, feed it once weekly before returning it to cold storage. Beginners should stick to daily room-temperature feeding until they're confident reading their starter's rise and bubble patterns.
What is the biggest mistake beginners make when feeding a sourdough starter?
The most common error is inconsistent feeding schedules. Beginners often forget to feed their starter on time, then try to compensate by feeding it multiple times in one day. This erratic pattern confuses your starter's microbial rhythm and weakens its strength. Another frequent mistake is using cold water straight from the tap, cold water slows fermentation. Use room-temperature water and establish a consistent daily feeding time. Consistency matters more than perfection; your starter thrives on predictable routines.
Building a reliable sourdough starter comes down to consistency: the same flour, the same feeding schedule, and the right adjustments when needed. At My Rustic Roots, we've seen beginners transform their starters by focusing on these fundamentals. Our freeze-dried starters and feeding guides help you establish that consistency from day one. When you have a strong foundation, the rest of sourdough becomes manageable and enjoyable. SHOP NOW to get started with confidence.