
Best Sourdough Starter Kit for Beginners 2026
Table of Contents
- Quick Comparison: Best Sourdough Starter Kit for Beginners 2026
- What Makes a Sourdough Starter Kit Beginner-Friendly?
- How to Activate Freeze-Dried Sourdough Starter (Step by Step)
- Essential Sourdough Baking Tools for Beginners
- Starter Kit Comparison by Skill Level and Budget
- Long-Term Storage, Preservation, and Material Safety
- Common Beginner Mistakes (and How to Avoid Them)
- Frequently Asked Questions
Last Updated: September 30, 2026
Quick Comparison: Best Sourdough Starter Kit for Beginners 2026
The best sourdough starter kit for beginners in 2026 removes the guesswork from your first bake. Most beginners quit in the first month, not because sourdough is hard, but because they bought the wrong setup and never saw a bubble. Here's the quick version:
| Kit Option | Price | Best For | What's Included |
|---|---|---|---|
| Sourdough Starter Jar Kit - 34 oz | $29.95 | Complete beginners | Glass jar, markings, bonus starter packet |
| Sure Start Fail-Proof Starter Culture | $9.96 | Nervous first-timers | 13 freeze-dried packets, hybrid culture |
| Purple Bag Organic Freeze-Dried Starter | $12.95 | Flavor-focused bakers | 12g San Francisco-style culture |
| Organic Mature Sourdough Starter | $10.95 | Faster activation | 12g mature wheat and rye culture |
| Sure Start Gluten-Free Starter | $11.95 | Gluten-free bakers | 12g hybrid gluten-free culture |
What Makes a Sourdough Starter Kit Beginner-Friendly?
A beginner-friendly sourdough starter kit activates reliably, is easy to monitor, and doesn't demand a rigid daily schedule.
Starter Type: Freeze-Dried vs. Live Culture
Freeze-dried starters arrive as dry powder and rehydrate with flour and water. They ship easily, store for years, and rarely spoil in transit. Live cultures arrive active but need feeding within a day or two.
Tools That Actually Matter in the First Month
You don't need a full bakery setup. In the first month, four tools do 90% of the work:
- A clear jar with measurement markings to watch rise and track feeding ratios
- A dough whisk for mixing thick dough without overworking it
- A bench scraper for portioning and shaping
- A proofing cover that breathes instead of trapping moisture
How to Activate Freeze-Dried Sourdough Starter (Step by Step)
Activating freeze-dried sourdough starter takes about five days from packet to first bake, mostly waiting between short feedings.
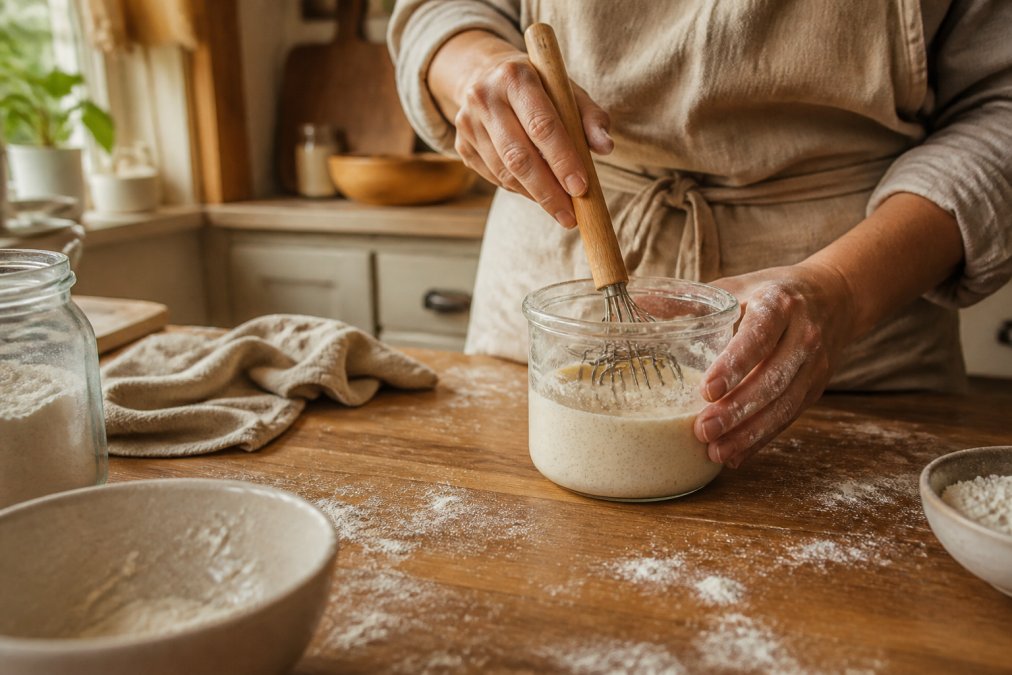
Here's the sequence that works:
- Empty the packet into a clean glass jar. Add lukewarm filtered water, around 80°F, and stir until the powder dissolves.
- Add flour and mix into a thick paste. Whole wheat or rye feeds wild yeast faster than white flour at this stage.
- Cover loosely with a breathable cloth and leave at room temperature, ideally 70-75°F.
- Wait 24 hours. You may see a few bubbles. Don't panic if you don't.
- Feed daily. Discard half, then add equal parts flour and water by weight.
- Watch for doubling. Once your starter doubles within 4-6 hours of feeding, it's ready to bake.
Essential Sourdough Baking Tools for Beginners
The essential sourdough baking tools for beginners are a jar, a whisk, a scraper, and a proofing cover. Add a bread lame once you're ready to score, and a baking vessel once your loaves hold their shape.
The Minimalist Kit (Weeks 1-4)
You're keeping a culture alive and watching it double. Four tools do 90% of the work:
- A clear glass jar with measurement markings. You need to see rise height and track feeding ratios by eye. A 34 oz jar handles a 100g starter with headroom for doubling, and glass doesn't hold odors or scratch into a hiding place for bacteria.
- A dough whisk. A Danish-style whisk with a stainless steel coil cuts through thick starter and stiff dough without dough climbing the tines like a balloon whisk.
- A bench scraper. Stainless steel, with a flat edge for portioning and a curved edge for bench work. Engraved measurement markings matter when dividing dough evenly.
- A breathable proofing cover. Cotton cloth or a silicone lid set loosely. Plastic wrap traps condensation against the surface, which is where mold starts.
The Intermediate Kit (Months 2-6)
Once your starter reliably doubles in 4-6 hours and your dough holds a shape, add:
- A banneton (proofing basket). The coiled cane or lined cloth wicks moisture and holds shape during the final proof, so dough springs up rather than spreads out. An 8-inch round fits a standard 500g boule.
- A bread lame. A retractable magnetic lame with replaceable razor blades gives you control over how the crust opens, and the blade slides back into the handle for safer storage.
- A digital scale. Weighing flour and water instead of scooping cups is the biggest variable you can control.
The Progression Kit (Month 6+)
- A Dutch oven or baking cloche. Enameled cast iron traps steam for the first 20 minutes, giving you oven spring and a blistered crust before you uncover it to brown.
- A second banneton. So you can proof one loaf while the other bakes.
- A probe thermometer. Dough temperature drives fermentation speed more than any other variable: 78°F versus 68°F tells you whether to expect a 4-hour or 8-hour bulk.
Material Trade-Offs That Actually Matter
| Material | Best For | Watch Out For |
|---|---|---|
| Glass | Jars, measuring | Heavy; can crack with thermal shock |
| Food-grade silicone | Proofing covers, mats | Can retain odors over time |
| Stainless steel | Scrapers, whisks, bowls | Reacts with nothing, but conducts cold |
| Wood | Handles, bannetons | Must dry fully or it warps and molds |
| Cane | Banneton coils | Needs flouring or it sticks |
My Rustic Roots built its catalog around this progression. The Sourdough Starter Jar Kit includes a 34 oz glass jar, feeding and temperature markings, and a bonus starter packet. The 13" Danish Dough Whisk uses a stainless steel coil and solid wood handle that cuts through dense dough without clogging. The stainless steel dough scraper has engraved measurement markings, and the retractable magnetic lame includes five razor blades and a scoring guide.

Starter Kit Comparison by Skill Level and Budget
Matching a kit to your skill level saves money and frustration, a first-timer doesn't need the same setup as a returning baker.
Sourdough Starter Jar Kit – 34 oz with →
| Your Situation | Recommended Starter | Price |
|---|---|---|
| Total beginner, low risk tolerance | Sure Start Fail-Proof | $9.96 |
| Want classic tangy flavor | Purple Bag San Francisco Style | $12.95 |
| Want fast, mild activation | Organic Mature Starter | $10.95 |
| Gluten-free baking | Sure Start Gluten-Free | $11.95 |
| Want jar and starter together | 34 oz Starter Jar Kit | $29.95 |
Long-Term Storage, Preservation, and Material Safety
Most guides stop at "put it in the fridge." That's fine for a two-week break, not for a month-long trip or a starter you want to keep for a decade. Here's the full preservation toolkit.
Dehydrated vs. Live: The Mechanism
A live starter is an active culture, wild yeast and lactic acid bacteria metabolizing flour right now. It needs feeding within a day or two of arrival and dies if neglected: instant activity, zero shelf life.
Three Storage Tiers
| Tier | Method | Feeding Cadence | Best For |
|---|---|---|---|
| Counter | Room temp, 70-75°F | Daily | Weekly bakers |
| Refrigerator | 38-40°F | Weekly | Occasional bakers |
| Dried | Air-dried flakes, sealed | None until rehydrated | Breaks over 1 month |
Counter storage keeps the culture most active and predictable but demands daily feeding. Miss three days and you'll smell acetone, your yeast has run out of food.
Travel and Long Breaks
If you're leaving for more than three weeks, don't gamble on the fridge, dry a portion first. The night before you leave, feed your starter, let it peak, then spread and dry a few tablespoons and seal the flakes in a labeled jar. On return, rehydrate with lukewarm water and flour and feed daily for 3-5 days.
Material Safety
Glass beats plastic for starter jars: it doesn't hold odors, cleans fully, and lets you see activity through the side. Stainless steel tools resist rust and won't react with starter acids. Food-grade silicone is fine for covers and mats but retains odors, so wash promptly. Wood handles are fine if dried thoroughly, a wet one is a mold farm.
Common Beginner Mistakes (and How to Avoid Them)
The biggest beginner mistake is overfeeding a starter that hasn't established itself. New bakers see no bubbles, assume it's hungry, and add flour and water daily, diluting the wild yeast population instead of building it.
| Mistake | What Happens | The Fix |
|---|---|---|
| Overfeeding a new starter | Culture stays weak, never doubles | Feed once daily, not more |
| Using chlorinated tap water | Wild yeast activity stalls | Use filtered or bottled water |
| Skipping the discard | Jar overflows, ratio goes off | Discard half before each feeding |
| Storing in a sealed jar | Pressure builds, mold risk rises | Cover with breathable cloth |
| Judging by time, not rise | Bakes before starter is ready | Wait for doubling in 4-6 hours |
| Cold kitchen, no adjustment | Fermentation crawls | Move to a warmer spot or extend time |
Frequently Asked Questions
What is the best starter kit for a beginner sourdough starter?
For most beginners, the best sourdough starter kit pairs a reliable culture with a jar you can actually watch. My Rustic Roots' Sourdough Starter Jar Kit ($29.95) includes a 34 oz glass jar with feeding and temperature markings plus a bonus starter packet. If you want extra insurance against a failed first batch, add the Sure Start Fail-Proof Sourdough Starter Culture ($9.96), which is designed for early bubbles and rise within the first two weeks.
Is it better to buy a freeze-dried starter or make one from scratch?
Making a starter from scratch takes one to two weeks of daily feeding and often stalls or grows mold before it stabilizes, which is why many beginners give up. A freeze-dried starter skips that risk. My Rustic Roots' Organic Mature Sourdough Starter ($10.95) is a well-established culture that activates faster and produces a milder flavor, while the Purple Bag San Francisco Style starter ($12.95) comes from a 170+ year heritage culture if you want a tangier loaf.
How long does it take for a freeze-dried starter to become active?
Most freeze-dried starters show bubbles and rise within two to four days of rehydrating and feeding, though full strength usually takes about a week of regular feedings at room temperature. The Sure Start cultures are built for faster, more reliable early activation, then mature into a traditional starter after roughly 14 days. Keep the jar somewhere warm, feed on schedule, and watch for bubbling and a domed rise before baking.
What essential tools should be included in a sourdough starter kit?
At minimum you need a clear jar with measurement markings, a dough whisk for mixing, a bench scraper for shaping, and a bread lame for scoring. My Rustic Roots covers each: the 13" Danish Dough Whisk ($12.95) cuts through dense dough without clogging, the Stainless Steel Dough Scraper ($8.00) has engraved measurement markings, and the White Magnetic Retractable Bread Lame ($12.95) includes five razor blades and a scoring guide. A reusable Bread Proofing Cloth ($14.95) rounds out the setup.
How do you maintain a sourdough starter after activating it?
Once active, feed your starter regularly with flour and water, keep it at room temperature if you bake often, or store it in the fridge to slow fermentation between bakes. A jar with clear markings makes it easy to track rise and keep feeding ratios consistent. If you forget a feeding, pour off the dark liquid on top, discard most of the starter, and feed again. A mature culture is resilient and usually recovers within a day or two.