
Essential Sourdough Tools for Small Batches That Fit Any Kitchen
Last Updated: November 17, 2026
Quick Summary
The essential sourdough tools for small batches are five items: a digital scale, a starter jar, a dough whisk, a scraper, and something to bake in. Spend on the scale first and the baking vessel second, since those two drive the outcome. Everything else is a convenience you can add later.
- Buy a digital scale that reads to 1 gram and handles at least 5 pounds.
- An 8-inch banneton holds a single 500-gram boule comfortably.
- Hold the lame at about 30 degrees and cut a quarter inch deep.
- A 25 oz starter jar is plenty for one loaf a week.
- The Professional Baking Set bundles a dough whisk, lame, and scraper for $29.95.
Table of Contents
- The Sourdough Equipment List That Actually Earns Its Counter Space
- Bread Making Tools for Beginners: Where to Spend First
- 1. A Digital Kitchen Scale Is the One Tool You Cannot Skip
- 2. Starter Jars, Dough Whisks, and Scrapers: The Mixing and Feeding Tools
- 3. Proofing Baskets, Cloths, and Baking Vessels for Small Loaves
- 4. Scoring Tools and Bread Lames for Clean Oven Spring
- How to Use Essential Sourdough Tools for Small Batches, Step by Step
- Building a Sourdough Equipment Kit on a Budget
- Frequently Asked Questions
The Sourdough Equipment List That Actually Earns Its Counter Space
Too many beginners buy a cabinet full of gear before their first loaf ever rises. The essential sourdough tools for small batches come down to five items: a digital scale, a starter jar, a dough whisk, a scraper, and something to bake in. That is the whole list.
Small-batch baking changes the math. When you are working with a single 500-gram loaf instead of three, every gram of water matters and every tool needs to justify its footprint.
Below, we break down which tools you truly need, which ones you can borrow from your kitchen drawer, and how to sequence them so a small loaf comes out right the first time.
What Counts as Essential Versus Optional
Sourdough tools split cleanly into two groups: the ones that change your result and the ones that only change your convenience.
Essential means the loaf fails without it. A scale is essential because volume measuring is guesswork. A jar is essential because your starter has to live somewhere. A dough whisk or your hands is essential because something has to mix. A scraper is essential because wet dough sticks to everything. A baking vessel is essential because bread needs contained heat.
Optional means the loaf still works. Bannetons, lames, slings, thermometers, and spray bottles all improve consistency or appearance, but a first loaf can happen without them.
A Quick Comparison of the Core Tools
| Tool | Why It Matters | Small-Batch Note | Typical Cost |
|---|---|---|---|
| Digital kitchen scale | Accurate weighing | 1-gram resolution matters more at small volumes | Budget to mid |
| Starter jar | Houses and monitors your starter | 25 oz is plenty for one loaf a week | Low |
| Dough whisk | Mixes stiff dough without overworking | Shorter batches mix by hand fast | Low |
| Bench scraper | Shapes, portions, cleans the counter | Ruler markings help divide small doughs evenly | Low |
| Baking vessel | Traps steam for oven spring | A small Dutch oven suits a single boule | Mid to high |
That table is the whole buying decision in five rows. Everything past it is refinement.
Bread Making Tools for Beginners: Where to Spend First
Spend on the scale first, the vessel second, and everything else in whatever order your budget allows. Those two items drive the outcome. A careful baker with a good scale and a preheated Dutch oven will outperform someone with every gadget and a guesswork recipe.
A common mistake is buying a proofing basket before owning a scale. Baskets are lovely. They also cannot tell you that you added 40 grams too much water, which is the actual reason your first loaf came out dense.
Here is how we would sequence the spend:
- First purchase: digital kitchen scale with 1-gram resolution
- Second purchase: a baking vessel sized to your loaf
- Third purchase: starter jar and a mixing tool
- Fourth purchase: scraper, then lame
- Last: proofing basket, sling, thermometer, spray bottle
The counterintuitive part: the cheapest items on that list, the scraper and the whisk, do more for your daily workflow than the expensive ones. King Arthur Baking's guide to sourdough basics makes the same point about starting simple.
1. A Digital Kitchen Scale Is the One Tool You Cannot Skip
A digital kitchen scale is the single non-negotiable piece of sourdough equipment, because bread formulas are ratios by weight and volume measuring drifts with how you scoop. A cup of flour can vary widely depending on whether it is packed or aerated, and at small batch sizes that variance is the difference between a open crumb and a brick.
Buy one that reads to 1 gram and handles at least 5 pounds. Anything fancier is a preference, not a requirement.
Watch out: a scale that only reads in 5-gram increments will round away your salt. At small batch volumes, that rounding is enough to make a loaf taste flat.
2. Starter Jars, Dough Whisks, and Scrapers: The Mixing and Feeding Tools
A starter jar, a dough whisk, and a bench scraper form the working core of any sourdough equipment kit, and all three together cost less than a single fancy baking vessel. The jar holds and monitors your culture, the whisk blends stiff dough without the clogging you get from a balloon whisk, and the scraper handles shaping and cleanup.
Our 25 oz Sourdough Starter Jar Kit is sized for exactly this job: clear glass so you can watch rise, wide mouth for feeding and cleaning, and easy-to-read feeding and temperature markings.
For mixing, a Danish dough whisk cuts through dense dough without overworking it. Our 13" Danish Dough Whisk has an open stainless steel coil that incorporates flour evenly and is easy to clean.
The scraper deserves more credit than it gets. A stainless bench scraper with ruler markings lets you divide a small dough into equal pieces without eyeballing it, and it lifts sticky dough off the counter without a fight.
If you want all three at once, our Professional Baking Set bundles the dough whisk, bread lame, and wooden scraper for $29.95.
3. Proofing Baskets, Cloths, and Baking Vessels for Small Loaves
Proofing baskets, cloths, and baking vessels are the shaping and baking stage, and for small loaves the sizing matters more than the brand.
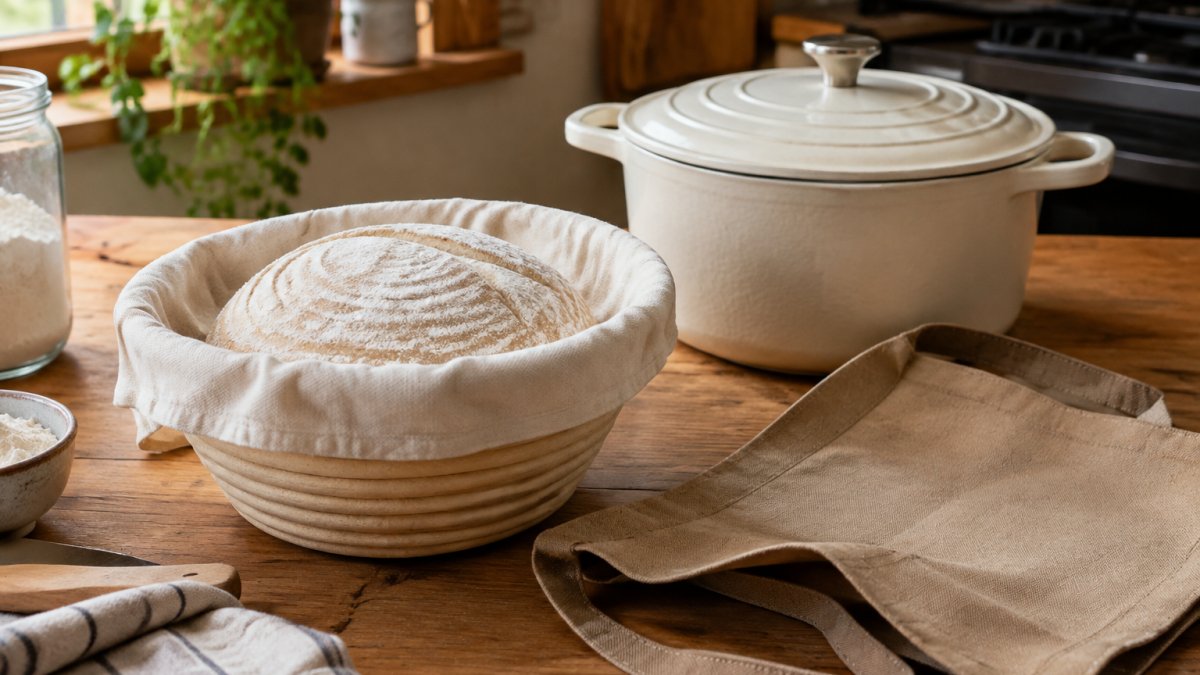
You do not need a banneton to start. A bowl lined with a floured cloth does the same job.
For the bake itself, a small Dutch oven or cast iron pot is the workhorse. It traps steam, which is what gives you oven spring and a crisp crust.
The transfer is where beginners get burned, literally. A silicone bread sling lets you lower dough into a screaming hot pot without your fingers anywhere near the rim.
Watch out: never put a cold pot into a hot oven or a hot pot onto a cold counter. Thermal shock can crack cast iron and enamel both.
4. Scoring Tools and Bread Lames for Clean Oven Spring
A bread lame is a handle that holds a razor blade, and it exists because scoring controls where your loaf opens in the oven. An unscored boule splits wherever the crust is weakest, which is unpredictable and usually ugly.
You can score with a bare razor blade or a sharp paring knife. A lame is safer and more controllable, and a retractable one is safer still.
The technique matters more than the tool. Hold the blade at a shallow angle, about 30 degrees to the surface, and cut a quarter inch deep in one smooth motion. Sawing back and forth tears the surface and deflates the dough.
For a deeper look at blade options and pattern ideas, our sourdough scoring tools guide walks through the choices.
How to Use Essential Sourdough Tools for Small Batches, Step by Step
Using sourdough tools for small batches follows a fixed sequence: weigh, mix, ferment, shape, proof, score, bake, cool. The tools change at each stage, but the order never does. Here is the workflow we would run for a single loaf.
Total time: about 24 hours, mostly hands-off Difficulty: beginner
What you'll need: digital scale, starter jar, dough whisk, bench scraper, proofing cloth or basket, baking vessel, lame, cooling rack
- Feed your starter. Weigh starter, flour, and water into the jar. Mark the level and leave it until it domes.
- Weigh the dough. Flour, water, salt, starter, all on the scale, zeroing between additions.
- Mix. Use the dough whisk until no dry flour remains. Rest, then mix again.
- Bulk ferment. Cover with the proofing cloth and let it rise until visibly puffy.
- Shape. Turn out onto the counter, use the scraper to gather it into a tight round.
- Proof. Rest in a cloth-lined bowl or basket, seam side up.
- Score. One confident cut with the lame, just before baking.
- Bake. Lower into the preheated vessel with the sling, lid on, then lid off to brown.
- Cool. On a rack, fully, before slicing.
If shaping is the step that intimidates you, our guide to shaping sourdough boules covers the motion in detail.
Scaling a Recipe Down Without Losing Accuracy
Halving a recipe is where small-batch bakers get into trouble, because the errors do not halve with the ingredients. A 5-gram salt error in a two-loaf batch is a rounding issue; in a single loaf it is a flavor problem.
Three rules keep small batches accurate. Weigh everything, including water and starter, in grams. Use a scale that reads to 1 gram. And write down what you actually did, because a small batch gives you fewer chances to notice a drift.
Keep your starter amount proportional rather than fixed. If you cut flour and water in half but leave the starter at full quantity, fermentation runs faster than the recipe expects and your timing collapses.
Building a Sourdough Equipment Kit on a Budget
Start with what you own. A glass jar from the pantry is a starter jar. A bowl and a tea towel is a proofing basket.
Then add deliberately. Our Professional Baking Set at $29.95 includes a dough whisk, bread lame, and wooden dough scraper in one purchase.
Cost per use is the number that matters. A bench scraper used four times a week for years costs pennies per loaf. A decorative banneton used twice a year does not.
Building a reliable small-batch routine is less about buying more and more about buying in the right order.
Frequently Asked Questions
What tools do I actually need for sourdough?
Start with four: a digital kitchen scale, a jar for your starter, a dough whisk or sturdy spoon, and something to bake in, such as a small Dutch oven or loaf pan. A dough scraper and a bread lame make shaping and scoring easier but are not strictly required for your first loaf. Everything else, including proofing baskets and bread slings, is a comfort upgrade you can add once you are baking regularly.
Can you bake sourdough without a Dutch oven?
Yes. A heavy loaf pan, a covered cast iron skillet, or a baking stone with an inverted metal bowl over the dough will all trap steam and give you a decent crust. The Dutch oven mainly makes steam management easier because the lid seals in moisture. For small batches, a 7 to 8.5 inch round pot is enough, and a silicone bread sling helps you lower the dough in without burning your fingers.
What size proofing basket is best for a small sourdough loaf?
For a small batch loaf built on roughly 250 to 350 grams of flour, choose a round banneton around 6 to 7 inches across or an oval about 8 inches long. A full-size 9 inch basket will let a small dough spread instead of holding its shape. If you only have a larger basket, line it with a cotton proofing cloth to take up some of the space and support the loaf.
Do you need a stand mixer to make sourdough bread?
No. A Danish dough whisk or even a sturdy wooden spoon handles small batches well, and the dough is usually mixed by hand in a bowl before stretch and folds. A stand mixer saves effort on large batches, but small-batch dough is light enough that hand mixing takes only a couple of minutes. Skipping the mixer also means less to clean, which matters in a compact kitchen.
What is the biggest mistake beginners make with sourdough bread?
Skipping the scale. Scooping flour by volume can swing the amount by 20 percent or more, which changes hydration and throws off fermentation timing. Weighing flour and water in grams keeps small batches consistent from one bake to the next, and it makes it far easier to scale a recipe down without guessing. A scale costs less than most other tools and fixes the most common source of dense, gummy loaves.
