
How to Shape Sourdough Boules for Beginners
Table of Contents
- What You'll Need Before Shaping
- Understanding Sourdough Bench Rest Time
- How to Create Surface Tension in Sourdough
- Step-by-Step: Shaping Your Sourdough Boule
- Essential Sourdough Shaping Tools
- Troubleshooting Common Shaping Problems
- Final Proof and Scoring Your Boule
- Frequently Asked Questions
Last Updated: October 7, 2026
What You'll Need Before Shaping
Before you shape sourdough boules for beginners, gather a bench scraper, a clean work surface, and dough that's ready to go.
The bench scraper is your most important tool: it handles sticky dough without adding flour, so high-hydration dough bakes into an open crumb.
You'll also want:
- A clean, dry work surface (wood or marble works best)
- A proofing cloth or kitchen towel
- A banneton basket or bowl lined with cloth
At My Rustic Roots, we recommend the Stainless Steel Dough Scraper. Its measurement markings and ergonomic handle make shaping easier for beginners.

Your dough should be around 75-78°F when you shape it.
Understanding Sourdough Bench Rest Time
Bench rest is the pause between pre-shaping and final shaping. It relaxes gluten and lets fermentation build strength. Most beginners skip it, then wonder why their boule springs back or tears.
A proper bench rest typically lasts 20-30 minutes at room temperature, but the right number depends on your dough, not the clock.
What Actually Happens During Bench Rest
- Gluten bonds relax, so the dough stretches without tearing
- Surface tension from pre-shaping firms the outer skin
- Fermentation continues slowly, adding flavor and gas
Skipping this step is the most common beginner mistake. Rushing from pre-shape to final shape gives you tight, springy dough that refuses to hold a round shape.
How Hydration Changes Your Bench Rest
Hydration level changes how long your dough needs to rest and how it behaves when you shape it.
High-hydration dough (78-85%): Slack and sticky, these need a longer bench rest, often 30-40 minutes, so the extra water absorbs fully.
Medium-hydration dough (72-78%): The sweet spot for beginners.
Low-hydration dough (65-72%): Stiff and quick to spring back, these need a shorter rest, 15-20 minutes, because they relax faster.
How Temperature Changes Your Bench Rest
Ambient temperature affects how fast gluten relaxes and fermentation continues.
- Warm kitchen (75-80°F): 15-20 minutes is often enough. Fermentation moves fast, so watch for puffy or slack dough.
- Average kitchen (68-74°F): 20-30 minutes is the standard window.
- Cool kitchen (below 65°F): 30-45 minutes may be needed. Gluten relaxes more slowly, and the dough stays tight longer.
Check the dough at 20 minutes, then every 5 minutes after. Press a finger into the surface: if the indent springs back slowly and leaves a slight mark, it is ready. If it springs back instantly, it needs more time. If it does not spring back at all, it has rested too long and is starting to slack.
If your bench rest is too short, the dough stays tight and springs back when you shape it. If it is too long, the dough turns slack and loses structure. When in doubt, err on the shorter side and add a second short rest if needed.
Dough Temperature at Bench Rest
Aim for dough that feels cool but not cold, roughly 75-78°F. If your kitchen is cold, rest the dough in a turned-off oven with the light on, or on top of the refrigerator. If your kitchen is hot, rest it in the coolest spot you have.
When to Skip or Shorten the Bench Rest
You can shorten the bench rest if your dough already feels relaxed after pre-shaping, your kitchen is warm and the dough is fermenting quickly, or you are shaping a low-hydration dough that relaxes fast. Do not skip it entirely: even a 10-minute rest makes final shaping noticeably easier.
How to Create Surface Tension in Sourdough
Surface tension is what holds your boule together. Without it, your loaf spreads flat instead of rising up. It forms when you stretch the dough's outer layer tight, creating a skin that traps gas and supports the rise, like stretched rubber holding air inside a balloon. Build it through shaping technique, not aggressive handling: gently pull the dough toward yourself, building tension gradually.
The Stitch Method
The Stitch method folds the dough and seals the seams, building tension from the inside out.
Here's how it works:
- Place your dough seam-side down on the work surface
- Fold the bottom edge up toward the center and press gently with the heel of your hand
- Fold the left side toward the center and press
- Fold the right side toward the center and press
- Fold the top edge down and seal all seams
- Flip the dough seam-side down and tighten with your bench scraper
It creates a strong structure and works well for dough that's slightly sticky or lacks elasticity, building strength without overworking it.
The Drag Method
The Drag method uses tension from pulling the dough across the work surface. It is faster and works best for dough with good gluten development.
Here's the process:
- Place your dough seam-side up on the work surface
- Cup your hands around the back of the dough
- Pull the dough toward you with a steady motion
- Rotate the dough slightly and repeat, working around the entire dough
- Flip the dough seam-side down when done
It creates surface tension quickly and is ideal for dough that's already strong and elastic, tightening the outer layer without folding.
Surface tension is what makes your boule round and tight. Without it, your dough spreads instead of rises. Both methods work, choose based on your dough's elasticity and your comfort level.
Step-by-Step: Shaping Your Sourdough Boule
Shaping sourdough boules for beginners follows a simple pattern: pre-shape, rest, final shape.
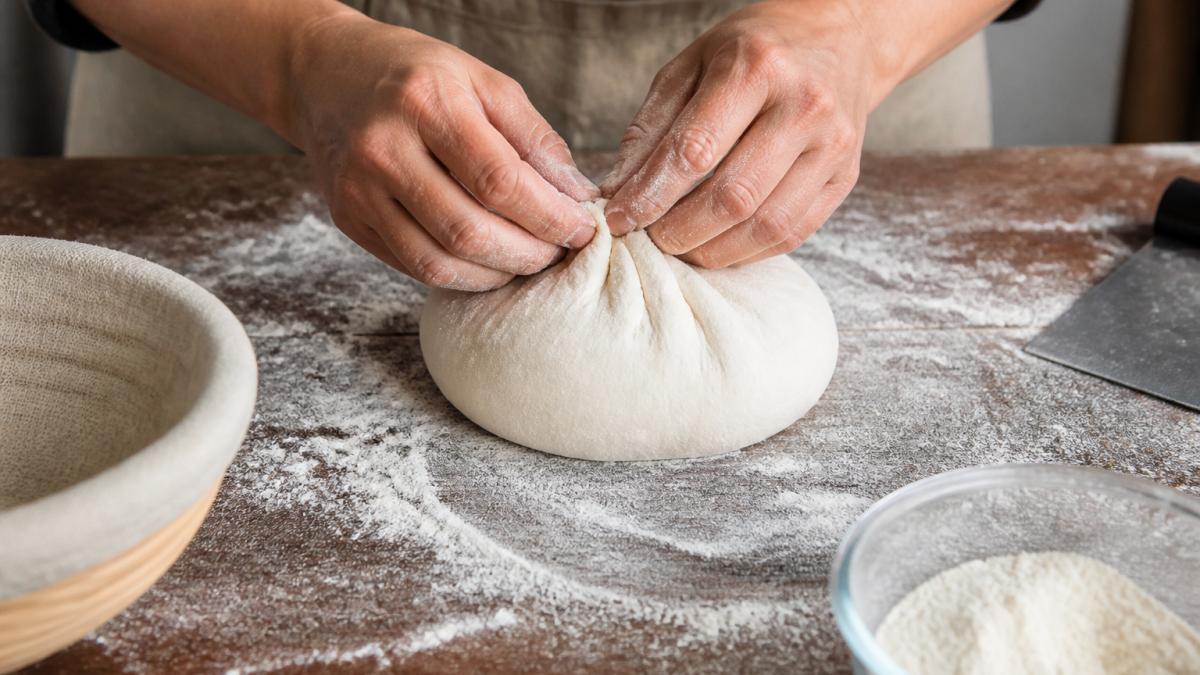
Step 1: Pre-Shape Your Dough (Time: 2 minutes)
Step 2: Bench Rest (Time: 20-30 minutes)
Let the dough sit uncovered for 20-30 minutes.
Step 3: Final Shaping (Time: 3-5 minutes)
Flip your pre-shaped dough seam-side up. Choose your shaping method: Stitch or Drag.
For the Stitch method, fold and press the edges toward the center.
Step 4: Flip and Tighten (Time: 1 minute)
Expected Result: Your boule should feel firm and round, with a tight outer surface.
Stainless Steel Dough Scraper | Green →
Essential Sourdough Shaping Tools
The right tools make shaping easier and faster. You only need the essentials.
Bench Scraper (Essential)
A bench scraper is your most important shaping tool: it handles sticky dough without adding flour and tightens the surface during final shaping.
The Stainless Steel Dough Scraper from My Rustic Roots has measurement markings and an ergonomic handle. It costs $8.00 and will last for years.
Proofing Cloth (Helpful)
A good proofing cloth protects your dough during the bench rest and final proof, preventing the surface from drying out. The Bread Proofing Cloth from My Rustic Roots is 35" x 30", reusable, costs $14.95, and works with any banneton basket.

Bread Sling (Optional but Useful)
A bread sling transfers your shaped dough into a hot Dutch oven without burning your hands or deflating the loaf. The 2-Arm Bread Sling costs $14.95 for a 2-pack and fits 7" to 8.5" Dutch ovens. The 4-Arm version costs $18.95 and offers more support.

Troubleshooting Common Shaping Problems
Shaping problems almost always trace back to hydration, starter activity, or dough temperature. Here is how to diagnose and fix each one.
Problem: Slack Dough That Will Not Hold Shape
Slack dough spreads out instead of standing up, feeling wet, loose, and heavy. It is the number one complaint from beginners shaping boules.
Step 1: Check your starter. It should double in size within 4-8 hours of feeding at room temperature.
Step 3: Use coil folds to rebuild structure. If your dough has gone slack during bulk fermentation, do 2-4 sets of coil folds spaced 30 minutes apart:
- Wet your hands so the dough does not stick
- Lift the dough from the center, letting the ends hang down
- Fold it back under itself, like folding a letter
- Rotate the bowl 90 degrees and repeat, doing 4 folds per set, one for each side of the bowl
Coil folds build strength without deflating the dough, are gentler than stretch-and-folds, and work especially well for high-hydration dough.
Slack dough is not ruined. Coil folds plus a 3-5% hydration drop on your next bake will fix it in most cases. If the dough still will not hold shape after coil folds, your starter is the problem, not your technique.
Problem: Tight Dough That Springs Back
Tight dough resists shaping and snaps back when you stretch it, meaning your gluten is overdeveloped or your bulk fermentation was too short.
The fix: Extend bulk fermentation by 30-60 minutes. The dough should feel soft, jiggly, and slightly domed before you shape it; if it still feels tight, give it another 30 minutes. During pre-shaping, use a light touch and let the dough relax on its own.
Problem: Irregular Shape or Flat Sides
Irregular shapes come from uneven tension: one side gets tight while another stays loose, so the boule bakes lopsided.
The fix: Rotate the dough as you shape, use even pressure all the way around, and do not focus on one side too long. With the Drag method, pull from all four sides equally, rotating a quarter turn between pulls; with the Stitch method, make the same number of folds on each side.
Problem: Dough Sticks to Everything
Sticky dough is usually a hydration issue, but it can also be a flour issue. If your dough sticks to your hands, the bench, and the scraper, try these fixes:
- Wet your hands instead of flouring them; water creates a non-stick barrier without changing hydration.
- Use a bench scraper to move the dough instead of your hands.
- Lightly flour the work surface, but only enough to prevent sticking; too much flour makes the dough stiff and hard to seal.
Problem: Dough Deflates During Shaping
If your dough deflates when you touch it, you have overproofed it: the gluten structure has weakened and cannot hold the gas anymore.
The fix: Shape gently and quickly, without punching down or kneading. Use the Stitch method to rebuild some tension, then place the boule in a banneton and bake it sooner rather than later. Overproofed dough will not recover fully, but gentle handling and a fast bake still give you a decent loaf.
Dough above 80% hydration is much harder to shape, especially for beginners. If you are struggling, start at 75% hydration and work up slowly. There is no prize for baking the wettest dough. A well-shaped 75% boule beats a puddle of 85% dough every time.
Quick Diagnosis Table
| Symptom | Likely Cause | Fix |
|---|---|---|
| Spreads flat, will not hold shape | Weak starter or high hydration | Feed starter, drop hydration 3-5%, coil folds |
| Springs back when stretched | Short bulk fermentation or cold dough | Extend bulk 30-60 min, warm the dough |
| Lopsided or flat sides | Uneven tension | Rotate while shaping, even pressure, tighten with scraper |
| Sticks to hands and bench | High hydration or too much flour | Wet hands, use scraper, chill 15-20 min |
| Deflates when touched | Overproofed | Shape gently, bake immediately |
Final Proof and Scoring Your Boule
After shaping, your boule needs a final proof, the last rise before baking.
Final Proof Duration
Cold Retard Option
Many bakers prefer a cold overnight proof, which develops flavor and makes scoring easier.
Scoring Your Boule
Scoring is a shallow cut on the surface before baking that controls how your loaf expands in the oven.
Use a sharp blade or lame.
Shaping sourdough boules for beginners gets easier with practice.
Frequently Asked Questions
Why is my sourdough boule flat after shaping?
A flat boule usually means weak surface tension or insufficient bulk fermentation. When you shape a boule, you're creating tension in the gluten network that holds the round shape during the final proof and oven spring. If your dough lacks elasticity, the surface tension collapses. Check that your starter is active and bubbly before mixing, and ensure bulk fermentation is complete when the dough increases by 25-50% and shows visible bubbles. Tighten your shaping technique by using the tuck-and-pull method to build more tension into the structure.
How long should I bench rest sourdough before shaping?
A bench rest of 20-30 minutes after bulk fermentation is ideal for beginners. This rest allows the dough to relax slightly, making it easier to shape without degassing all the air you've built up. The timing also depends on temperature: warmer kitchens may need only 15-20 minutes, while cooler environments might benefit from 30-40 minutes. During this time, cover your dough with a proofing cloth to prevent it from drying out. A proper bench rest helps the dough become more elastic and easier to handle, reducing the risk of tearing.
Do I need a banneton to shape a sourdough boule?
A banneton (proofing basket) is helpful but not absolutely required for beginners. It supports your shaped boule during the final proof and makes scoring easier. If you don't have one, you can use a bowl lined with a well-floured proofing cloth or kitchen towel. The key is creating a surface that prevents sticking while supporting the round shape. A banneton does make the process more consistent and is worth the investment if you plan to bake regularly, but bread slings and proofing cloths offer affordable alternatives for starting out.
How do I know if my sourdough boule is shaped tightly enough?
A properly shaped boule should feel firm but not rock-hard when you gently press it. The surface should be smooth and taut, with no visible loose folds or wrinkles. When you flip it seam-side up into your banneton or proofing cloth, it should hold its round shape without slumping. During the final proof, the boule should rise noticeably but maintain its structure. If your shaped dough feels slack or sloppy, you haven't built enough tension. Practice the tuck-and-pull technique to create stronger surface tension, which directly affects how tight and structured your boule becomes.