
Sourdough Bread Making for Absolute Beginners
Table of Contents
- What Is Sourdough and Why Start Here
- Essential Sourdough Baking Tools You Actually Need
- Creating and Activating Your Sourdough Starter
- Sourdough Starter Maintenance for Beginners
- The Sourdough Fermentation Timeline: From Mix to Bake
- Troubleshooting Common Sourdough Mistakes
- Your First Loaf: A Step-by-Step Walk-Through
- Conclusion
- Frequently Asked Questions
Last Updated: September 20, 2026
What Is Sourdough and Why Start Here
Sourdough bread making uses a live culture of wild yeast and lactic acid bacteria to create naturally leavened bread without commercial yeast. At My Rustic Roots, we believe this ancient method is more accessible than most people think.
The long fermentation process develops complex flavors, improves digestibility, and creates a crackling crust. Unlike commercial bread that peaks on day one, sourdough tastes better on day two and three.
Beginners often fail because they chase perfection on loaf one, follow time-based instructions written for other kitchens, and expect professional results immediately. The path forward is understanding what actually matters and building confidence through small wins.
Modern tools and freeze-dried starters have removed most of the guesswork. You don't need to capture wild yeast or maintain a starter for weeks. What you need is a realistic understanding of the process and visual cues instead of rigid timers.
Essential Sourdough Baking Tools You Actually Need
Most beginners buy too much equipment. Start with what actually matters.
A Dutch oven is non-negotiable. The trapped steam creates oven spring and develops the crispy, blistered crust that defines good sourdough. A 5-6 quart cast iron or enameled steel Dutch oven works perfectly.
A bench scraper helps during mixing and shaping. The My Rustic Roots Professional Baking Set includes a wooden dough scraper, dough whisk, and bread lame for the essential stages of sourdough bread making.
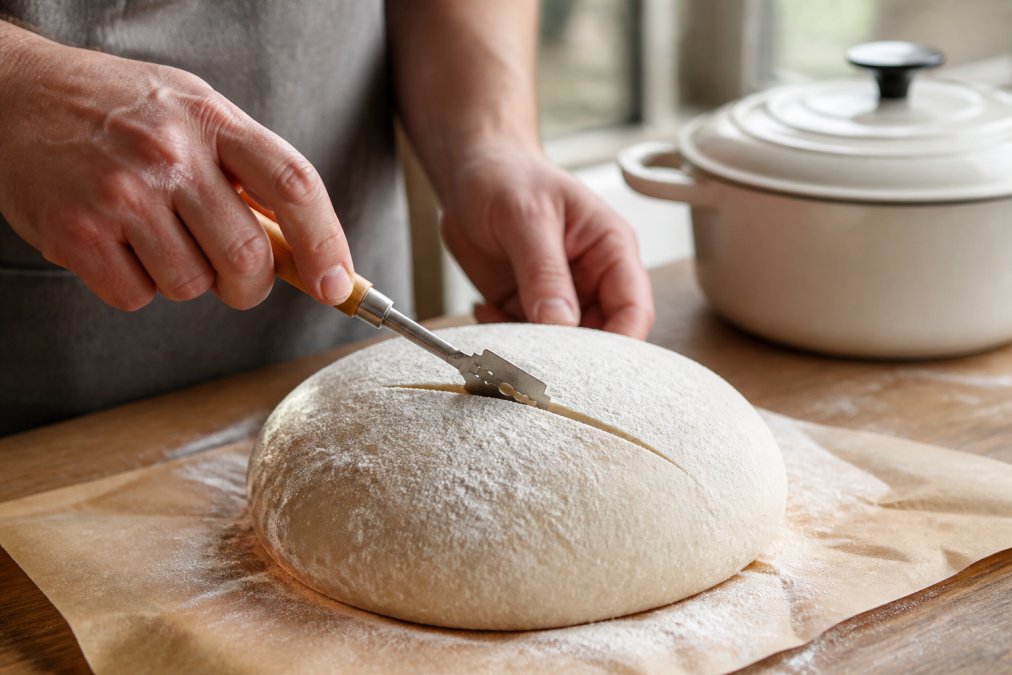
A bread lame controls where the dough expands in the oven and creates the signature "ear" on the side of the loaf. The My Rustic Roots White Magnetic Retractable Bread Lame comes with five razor blades and a scoring guide.
A proofing basket helps the dough hold its shape during the final proof. The My Rustic Roots Bread Proofing Cloth is a reusable 100% cotton alternative that's breathable and washable.
A bread sling simplifies transferring shaped dough into a hot Dutch oven safely. The My Rustic Roots Bread Sling 2-Arm Design fits round Dutch ovens 7" to 8.5" with a non-stick silicone surface.
Beyond these, you need a scale (for accuracy), a bowl, a kitchen towel, and a way to measure temperature.
| Tool | Purpose | Budget Alternative |
|---|---|---|
| Dutch oven | Traps steam for crust development | Cast iron or enameled steel pot with lid |
| Bread lame | Scores dough for controlled expansion | Sharp serrated knife (less control) |
| Proofing cloth | Supports dough during final proof | Floured kitchen towel |
| Bread sling | Transfers dough safely into hot pot | Parchment paper (less reliable) |
| Dough scraper | Folds and shapes dough | Plastic bench scraper or bowl scraper |
Creating and Activating Your Sourdough Starter
A sourdough starter is a living culture of wild yeast and lactic acid bacteria that ferments your dough and develops tangy flavor. You can capture it from scratch (5-7 days) or use a freeze-dried starter (24-48 hours).
For absolute beginners, a freeze-dried starter removes the most common failure point. The Sure Start Fail-Proof Sourdough Starter Culture from My Rustic Roots is specifically designed for this. It's a hybrid culture that combines organic sourdough culture, potato flakes, wild yeast, and probiotics to give you reliable bubbles and fermentation activity from day one, then naturally transitions into traditional sourdough over time.
To activate a freeze-dried starter, mix one packet with equal parts flour and water (roughly 50 grams each) in a clean jar. Cover loosely with a cloth and leave at room temperature (68-75°F is ideal).
By 24 hours, you should see bubbles and smell fermentation activity. By 48 hours, the starter should double in volume and smell pleasantly sour. Warmer kitchens activate faster; cooler ones move slower.
Once your starter is reliably doubling between feedings, it's ready to use for sourdough bread making. This usually takes 3-5 days with a freeze-dried starter.
Sourdough Starter Maintenance for Beginners
A sourdough starter needs consistent feeding on a schedule that matches your baking rhythm, not daily attention.
Feed your starter on a schedule matching your baking rhythm. Discard half the starter, then add equal parts flour and water by weight (e.g., 50g starter + 50g flour + 50g water).
Room temperature (68-75°F) is ideal. Watch your starter double in size, then feed it. Don't feed it on a clock.
Between feedings, cover your starter loosely with a cloth. It needs air but shouldn't dry out.
A neglected starter can survive in the refrigerator for weeks.
The Sourdough Fermentation Timeline: From Mix to Bake
Sourdough bread making follows a predictable sequence, but timing varies by temperature and starter strength. Visual cues replace rigid timers.
| Stage | Duration | Visual Cue | Temperature Dependent |
|---|---|---|---|
| Autolyse | 30-60 min | Dough becomes smooth | Minimal |
| Bulk Fermentation | 4-8 hours | 50-75% volume increase, visible bubbles | Yes, warmer = faster |
| Bench Rest | 20-30 min | Dough relaxes | Minimal |
| Cold Proof | 8-48 hours | Dough firms up in fridge | No, cold is controlled |
| Baking | 45-50 min | Deep brown crust, hollow sound when tapped | No, oven controlled |
Troubleshooting Common Sourdough Mistakes
Your first loaf probably won't look like the one on Instagram. That's normal. Here's what usually goes wrong and why.
Your First Loaf: A Step-by-Step Walk-Through
Here's a practical timeline for your first loaf, assuming 70°F room temperature and an active freeze-dried starter.
Conclusion
Sourdough bread making is less about perfect instructions and more about understanding what your dough is telling you. Visual cues matter far more than timers. Focus on the fundamentals and you'll have something delicious.
Frequently Asked Questions
What is the biggest mistake beginners make with sourdough bread?
The most common error is ignoring visual cues and relying only on time. Fermentation speed depends on room temperature, flour type, and hydration, not the clock. Watch for the dough to increase 50-75% in volume during bulk fermentation and pass the float test before shaping. Many beginners also skip the autolyse (resting flour and water before mixing), which builds gluten strength naturally and makes handling easier.
How long does it take to make sourdough bread from scratch?
Total time spans 24-48 hours, but active hands-on work is only 30-45 minutes. After mixing and autolyse (30 minutes), bulk fermentation takes 4-6 hours at room temperature with periodic stretch and fold intervals. Cold proofing overnight (8-16 hours) develops flavor and makes scoring easier. Final oven time is 45-50 minutes. Cold proofing can be extended to 2-3 days for deeper flavor development.
What is the 1/3/3 rule for sourdough starter?
This beginner-friendly feeding ratio means: 1 part active starter, 3 parts flour, 3 parts water by weight. For example, 50 grams starter, 150 grams flour, 150 grams water creates a balanced culture that ferments predictably. This ratio works at room temperature (68-72°F) and produces a starter ready to bake with in 4-8 hours. Adjust water slightly if using different flour types, as hydration affects fermentation speed.
How do I know when my sourdough starter is ready to bake with?
Your starter is ready when it doubles or triples in volume within 4-8 hours of feeding and passes the float test: drop a small spoonful into water, if it floats, the culture has enough gas production. Look for visible bubbles throughout, a pleasant sour smell, and a slightly domed surface. A freeze-dried starter like Sure Start helps customers see reliable bubbles, rise, and fermentation in the early days, removing the guesswork for beginners who've struggled before.
What tools do I really need to start sourdough bread making?
At minimum: a mixing bowl, kitchen scale (for accurate ratios), a Dutch oven or covered baking vessel, and a way to score your loaf. A bread lame or sharp knife works for scoring. Optional but helpful tools include a dough whisk for mixing stiff doughs, a proofing cloth to cover rising dough, and a bread sling for safely transferring dough into hot pots without burns or deflation. The Professional Baking Set includes a dough whisk, bread lame, and scraper, three tools that handle mixing, scoring, and shaping.
Can sourdough fermentation actually break down gluten for people with sensitivity?
Long fermentation does reduce gluten levels through enzymatic breakdown by wild yeast and lactic acid bacteria, though it does not eliminate gluten entirely. The extended fermentation timeline (24-48 hours) and cold proofing allow more time for these microbes to work. However, sourdough is not gluten-free and should not replace medical advice for celiac disease or severe sensitivity. If you have gluten sensitivity, consult a healthcare provider before relying on sourdough as a solution.
Why did my sourdough starter fail, and will a freeze-dried starter actually work?
Common failure causes: inconsistent feeding schedules, cold room temperatures below 65°F, or using chlorinated water that inhibits wild yeast. Freeze-dried starters like Sure Start skip the unpredictable wild-capture phase by including a hybrid culture with probiotics and potato flakes, which jump-start early activity. This removes the 7-14 day wait and the risk of mold or stagnation. Once activated, the culture naturally transitions to traditional sourdough sustained by wild yeast and lactic acid bacteria.
How do I keep my starter alive without feeding it every day?
Store your starter in the refrigerator and feed it once per week. Cold temperatures slow fermentation dramatically, so a well-fed starter survives 7-10 days in the fridge with minimal activity. Before baking, remove it and feed at room temperature for 4-8 hours until it doubles and passes the float test. If you forget and it develops a dark liquid (hooch) on top, stir it back in, it's just concentrated yeast and bacteria, not spoilage. Consistent weekly feeding is far easier than daily maintenance.
The challenge most beginners face isn't the complexity of sourdough, it's the gap between what they expect and what they achieve on attempt one. My Rustic Roots closes that gap with freeze-dried starters that activate reliably, professional-grade tools that make each step easier, and products made in the USA from organic, non-GMO ingredients. Get started with My Rustic Roots and bake your first successful loaf with confidence.