
Sourdough Starter Feeding Schedule for Beginners
Table of Contents
- What You'll Need Before You Start
- Understanding Sourdough Starter Feeding Ratio
- How Often to Feed Sourdough Starter at Room Temperature
- Recognizing Sourdough Starter Peak Time After Feeding
- Sourdough Starter Feeding Schedule in the Fridge
- Step-by-Step Feeding Process
- Common Mistakes to Avoid
- Frequently Asked Questions
Last Updated: October 15, 2026
What You'll Need Before You Start
Before you begin your sourdough starter journey and establish a sourdough starter feeding schedule, gather a few essentials.
At My Rustic Roots, we recommend starting with a quality jar that holds at least 25 ounces. Our Sourdough Starter Jar Kit includes easy-to-read feeding and temperature markings.

You'll also want a kitchen thermometer to monitor temperature, since warmth affects how fast your starter ferments. A breathable cloth or coffee filter covers the jar during feeding.
The good news: you probably have most of these items already. A mason jar from your pantry works just fine. The key is consistency and patience, not expensive equipment.
Understanding Sourdough Starter Feeding Ratio
A sourdough starter feeding ratio describes the proportions of starter, flour, and water you mix together at each feeding. The ratio determines how quickly your starter rises and how active it becomes. Getting this right is the foundation of a reliable feeding schedule.

Common Ratios Explained
The most common ratios follow a simple pattern: starter-to-flour-to-water. Here are the main ones you'll encounter:
1:1:1 Ratio, This means equal parts starter, flour, and water by weight. If you feed 25 grams of starter, add 25 grams of flour and 25 grams of water. This ratio creates a thick, stiff consistency. It ferments slowly and suits bakers who feed once daily or less frequently.
1:2:2 Ratio, Double the flour and water relative to your starter. Feed 25 grams of starter with 50 grams of flour and 50 grams of water. This thinner mixture ferments faster and is popular for daily feeding routines.
1:4:4 Ratio, Four times as much flour and water as starter. This creates a loose, thin batter. It ferments very quickly, often peaking within 4-6 hours at room temperature.
100% Hydration, A special ratio where flour and water are equal by weight. If you use 50 grams of flour, add 50 grams of water. This creates a pancake-like consistency. It's useful for sourdough recipes that call for liquid starter.
Choosing the Right Ratio for Your Routine
Your lifestyle determines which ratio works best. If you bake bread twice a week and have a predictable schedule, the 1:2:2 ratio suits most beginners. It's forgiving and doesn't demand precision.
If you bake daily or have an unpredictable schedule, try 1:1:1. The slower fermentation gives you flexibility. You can feed in the morning and bake anytime that day without rushing.
The 1:4:4 ratio works for experienced bakers who want maximum activity and speed. New starters shouldn't start here, it's easy to overfeed and create waste.
Temperature matters too. Warm kitchens (above 75°F) ferment faster, so use a thicker ratio like 1:1:1. Cool kitchens (below 70°F) need thinner ratios like 1:2:2 to ferment in a reasonable timeframe.
How Often to Feed Sourdough Starter at Room Temperature
At room temperature, most starters need feeding once or twice daily. The exact frequency depends on your ratio, temperature, and how active your starter is. A new starter typically needs daily feeding to build strength.
The Daily Feeding Routine
For a beginner using a 1:2:2 ratio at 70-75°F, feed your starter once per day. Here's a simple routine:
- Feed in the morning around 8 AM
- Your starter peaks (doubles in size) around 4-6 PM
- Use it for baking, or let it rest overnight in the fridge
- Feed again the next morning
This rhythm works because the starter has time to fully ferment between feedings. You see clear activity, bubbles, rise, and a pleasant sour smell, which builds confidence.
If your kitchen runs warmer (75-80°F), your starter may peak faster, sometimes within 4 hours. You might need to feed twice daily to prevent it from collapsing between feedings. Twice-daily feeding also suits bakers who bake multiple times per week.
Adjusting Frequency by Temperature
Temperature is the biggest factor in feeding frequency. Warmer kitchens speed up fermentation; cooler ones slow it down.
At 68-70°F, Feed once daily using a 1:1:1 ratio. Your starter takes 8-12 hours to peak. This works well for cooler seasons or basements.
At 70-75°F, Feed once daily using a 1:2:2 ratio. Peak happens in 6-8 hours. This is the sweet spot for most home kitchens.
At 75-80°F, Feed twice daily or use a thinner 1:4:4 ratio once daily. Fermentation speeds up significantly.
Above 80°F, Feed twice daily with a 1:1:1 or thinner ratio. Heat accelerates activity dramatically.
A simple rule: if your starter peaks in less than 6 hours, feed more often or use a thicker ratio.
Recognizing Sourdough Starter Peak Time After Feeding
Peak activity is when your starter has risen fully and shows maximum fermentation. Baking with starter at peak gives you the most lift and best flavor. Learning to spot peak is more important than following a strict timer.
Visual Signs of Peak Activity
Look for these clear signs that your starter has peaked:
- The starter has doubled (or nearly tripled) in volume, It should rise noticeably in the jar. Measure the level before feeding, then watch it climb.
- Bubbles cover the surface, Small bubbles appear throughout, especially on top. A thick foam layer is a good sign.
- The surface shows a slight dome or peak, The top bulges slightly outward before it starts to fall.
- It smells pleasantly sour and yeasty, A strong, slightly tangy aroma means active fermentation.
- The texture looks airy and light, Peak starter appears fluffy, not dense or gluey.
The jar's markings help. If your jar has feeding lines, you can see exactly when the starter reaches double its original volume. My Rustic Roots jars include these guides for this reason, they remove guesswork.
Don't rely on time alone. A starter might peak at 4 hours in a warm kitchen or 10 hours in a cool one. Visual cues are your real guide.
Timing Your Bake Around Peak
Use your starter right at peak for best results. This is when yeast activity is highest and your dough will rise most actively. If you miss peak and your starter starts to fall, it's still usable, just slightly less powerful.
Here's a practical approach: feed your starter in the morning, watch for peak activity in the afternoon, then mix your dough. You'll have maximum fermentation power. If you can't bake at peak time, refrigerate your starter. Cold slows fermentation dramatically, keeping it active for several days.
Sourdough Starter Feeding Schedule in the Fridge
Refrigerator storage lets you maintain your starter with minimal effort. Most bakers feed once weekly when refrigerated. The cold dramatically slows fermentation, so your starter stays healthy without daily attention.
Weekly Maintenance Feeding
Here's a simple refrigerator routine:
- Feed your starter once per week (every 7 days works for most people)
- Use a 1:1:1 or 1:2:2 ratio
- Let it sit at room temperature for 1-2 hours after feeding
- Return it to the fridge
This schedule keeps your starter active without waste. You're feeding it enough to stay strong, but not so often that you're throwing away excess starter constantly.
Sourdough Starter Jar Kit – 25 oz with free bag of starter included →
Some bakers prefer feeding twice weekly if they want extra assurance. This is fine, though once weekly is usually sufficient for a mature, healthy starter.
Before baking, remove your starter from the fridge, feed it, and let it sit at room temperature until it peaks (usually 4-8 hours). Then use it in your dough. This ensures maximum activity.
Transitioning Between Counter and Cold Storage
Moving your starter between room temperature and the fridge is simple. The key is timing.
From counter to fridge: Feed your starter, let it sit at room temperature for 1-2 hours, then refrigerate. You want some fermentation activity started before cold storage slows it down.
From fridge to counter: Remove your starter, feed it, and leave it at room temperature. It will wake up and become active again within a few hours.
This flexibility is one reason refrigerator storage is so popular. You can keep your starter dormant for weeks if needed, then revive it with a single feeding.
Step-by-Step Feeding Process
The actual feeding process takes just a few minutes. Here's exactly how to do it, whether you're using the discard method or the no-discard approach.
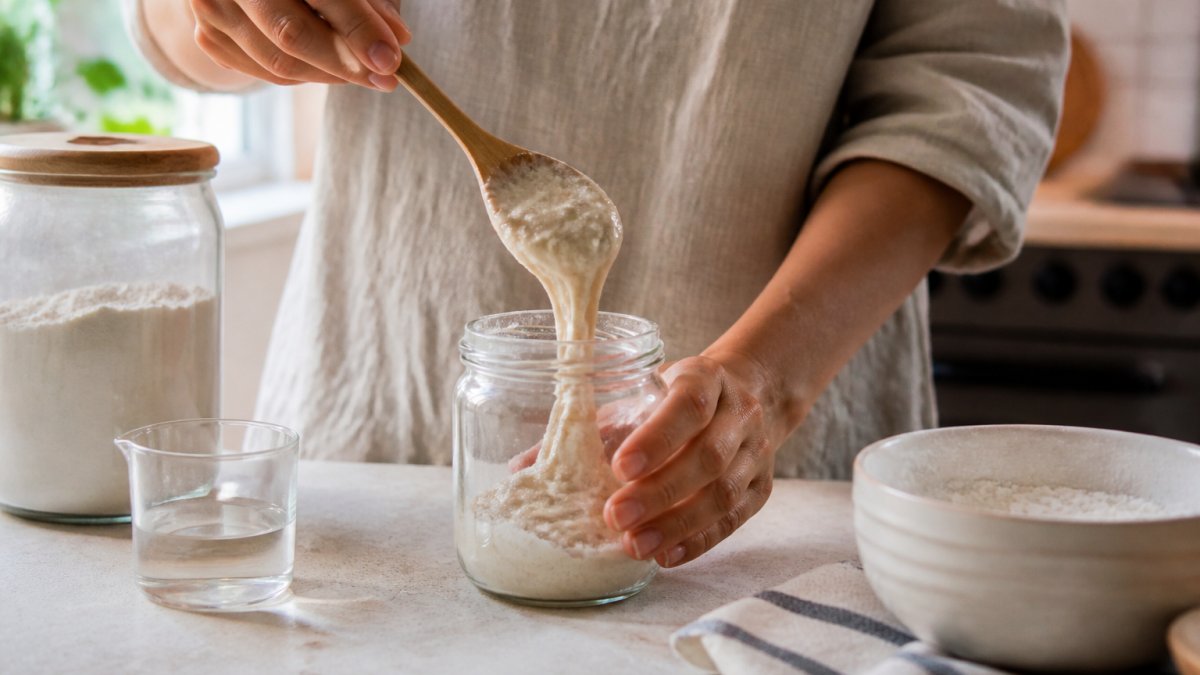
Discard and Feed Method
This is the most common method for beginners. You remove part of your starter, then feed what remains.
Step 1: Check your starter. Look at the jar. Is it bubbly and active? Does it smell sour and yeasty?
Step 2: Discard half (or most) of your starter. Scoop out about half the amount in the jar.
Step 3: Measure your feeding ratio. Use a scale.
Step 4: Mix thoroughly. Stir everything together until no dry flour remains.
Step 5: Cover loosely and let it ferment. Place a cloth or coffee filter over the jar.
The discard method feels wasteful at first. But that discarded starter makes great pancakes, crackers, or compost. Nothing goes to waste.
No-Discard Alternative
If you hate throwing away starter, try the no-discard method. It works well for small starters or infrequent bakers.
Step 1: Weigh your starter. Say you have 50 grams.
Step 2: Add flour and water without discarding. Using a 1:2:2 ratio, add 100 grams of flour and 100 grams of water directly to the jar.
Step 3: Mix and ferment. Stir, cover loosely, and let it ferment as usual.
The downside: your jar fills up faster, and you need a bigger container eventually. But you never throw anything away.
My Rustic Roots' Complete Sourdough Starter Jar Kit includes a silicone spatula and feeding tracker band, making both methods easier.
Common Mistakes to Avoid
Even careful bakers stumble. Here are the most common feeding mistakes and how to fix them:
Skipping feedings. Your starter won't die from a missed feeding, but it gets weaker. If you forget for a few days, feed it once and wait 24 hours before using it. It usually bounces back.
Feeding with chlorinated tap water. Chlorine can slow fermentation. Use filtered water or let tap water sit overnight so chlorine evaporates.
Using the wrong temperature. Cold kitchens slow everything down.
Not discarding before feeding. Skipping the discard step means your jar overflows and you're feeding a massive, sluggish starter. Discard half before each feeding.
Switching ratios too often. Pick a ratio that matches your temperature and schedule, then stick with it for two weeks.
Trusting time over visual cues. "Feed it every 12 hours" is a guideline, not a law. If your starter hasn't peaked yet, wait.
Using a sealed lid. Fermentation produces gas. A sealed jar can crack or explode.
Sourdough starters seem intimidating, but feeding is genuinely simple once you see the pattern. You'll have a strong, active starter ready to bake with confidence. SHOP NOW and start baking real sourdough bread at home.
Frequently Asked Questions
Should you feed a sourdough starter at a 1:1:1 or 1:2:2 ratio?
Both work, it depends on your schedule and goals. A 1:1:1 ratio (equal parts starter, flour, water) feeds more frequently and keeps your starter very active, ideal for daily baking. A 1:2:2 ratio uses less starter and produces more dough, requiring fewer feedings per day. Beginners often prefer 1:1:1 for simplicity, though 1:2:2 wastes less flour if you're not baking daily. Choose based on how often you plan to bake.
How often should you feed a sourdough starter at room temperature?
Feed once or twice daily, depending on your kitchen temperature and feeding ratio. At 70-75°F, most starters need feeding every 12 hours on a 1:1:1 ratio. Warmer kitchens (above 80°F) may require twice-daily feeding to prevent over-fermentation. If using a 1:2:2 ratio, once daily is usually sufficient. Consistency matters more than exact timing, pick a schedule you can stick to.
What is the biggest mistake beginners make when feeding sourdough starter?
Forgetting to discard before feeding, or discarding too much. If you skip the discard step on a 1:1:1 ratio, your starter becomes overly diluted and weak. Many beginners also feed inconsistently, changing schedules or ratios without giving the starter time to adapt. Stick to one routine for at least two weeks before adjusting. A kit with a feeding tracker band helps you stay on schedule.
How can you tell when a sourdough starter is ready for baking after feeding?
Your starter reaches peak activity 4-8 hours after feeding, depending on temperature and ratio. Look for the starter to roughly double in volume, show a dome or slight dome shape at the top, and display visible bubbles throughout. It should smell pleasantly sour and yeasty. If it falls back down or develops a liquid layer on top, you've missed peak. Bake immediately when peak is reached for the best rise and flavor.