
How to Activate Freeze-Dried Sourdough Starter
Table of Contents
- What You'll Need Before Starting
- How to Activate Freeze-Dried Sourdough Starter: A Day-by-Day Schedule
- Freeze-Dried Versus Air-Dried Starter: Key Differences
- Freeze-Dried Sourdough Starter Feeding Schedule and Ratios
- How Long to Activate Sourdough Starter and Readiness Signs
- Signs Sourdough Starter Is Ready to Bake
- Troubleshooting Inactive Sourdough Starter
- Common Mistakes to Avoid During Activation
- Frequently Asked Questions
Last Updated: October 12, 2026
What You'll Need Before Starting
Activating a freeze-dried sourdough starter is straightforward, but the right supplies make it smoother. You'll need filtered water, organic flour, and a clean glass jar, plus a room between 68°F and 75°F for consistent results.
Here's what to gather:
- Freeze-dried starter (12g packet from My Rustic Roots works well)
- Filtered or spring water (avoid chlorinated tap water, which can inhibit fermentation)
- Organic flour (all-purpose or bread flour, matching the starter type you purchased)
- Glass jar (at least 1 quart capacity to allow room for rising)
- Spoon or small whisk (for mixing)
- Cloth or coffee filter (to cover the jar loosely, the starter needs air)
- Kitchen scale (optional but helpful for precise measurements)
- Thermometer (to monitor water temperature)
Freeze-dried starters are stable, ideal for beginners or as a gift.

At My Rustic Roots, each 12g packet contains a mature, stable culture ready to wake up with just water, flour, and time. The organic, non-GMO ingredients mean a clean, predictable foundation.
How to Activate Freeze-Dried Sourdough Starter: A Day-by-Day Schedule
Activation typically takes 5-7 days, though some starters show activity sooner.
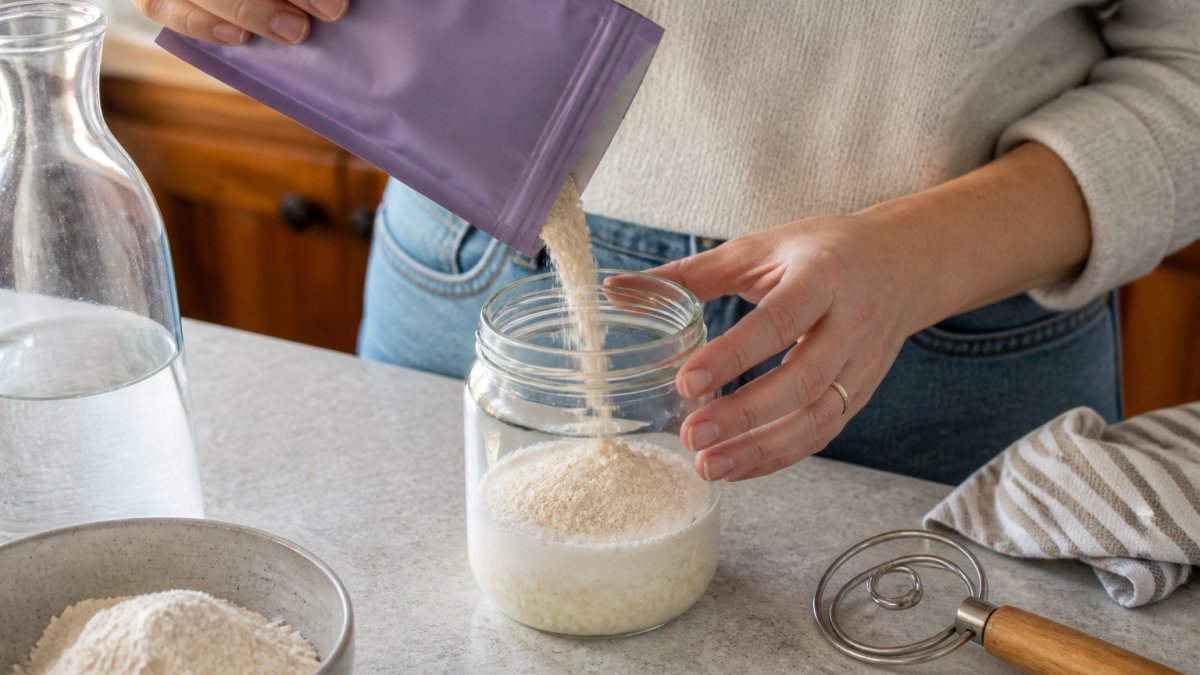
Day 1: Rehydrate and Mix
Measure out 12g of freeze-dried starter and combine it with 50g of filtered water (lukewarm, around 70°F) in your clean glass jar. Stir until fully dissolved; the thin, watery look is normal.
Add 50g of flour, matching your starter type if possible, and stir until you have a thick, pancake-batter paste with no dry flour remaining.
Cover loosely with a cloth or coffee filter, since the starter needs oxygen, and leave at room temperature, ideally 70°F to 75°F.
Days 2-4: Initial Feedings
On day 2, you may see no activity yet, which is normal. Discard half (about 50g) and feed the remainder with 50g flour and 50g filtered water, then stir and cover loosely.
Repeat on days 3 and 4: discard half, then feed equal parts flour and water. By day 3 or 4, small bubbles should form on the surface and edges, and a slight sour smell signals lactic acid bacteria at work.
Keep the jar at room temperature, away from heating vents, air conditioning, and direct sunlight, since temperature swings slow fermentation.
Days 5-7: Building Strength and Activity
By day 5, expect consistent bubbles and a sour aroma. Continue daily feedings at 1:1:1 (equal parts starter, flour, and water by weight), such as 50g each.

On days 6 and 7, watch for predictable rising and falling: it should roughly double within 4-8 hours after feeding, with vigorous bubbles throughout, not just on top.
Freeze-Dried Versus Air-Dried Starter: Key Differences
Knowing how freeze-dried starters differ from air-dried ones helps you set expectations and troubleshoot. Both are dormant cultures needing reactivation, but they behave differently.
Freeze-dried starters are processed at very low temperatures, preserving the cell structure of wild yeast and lactic acid bacteria.
Air-dried starters are dried at warmer temperatures, and often take 7-10 days to show consistent activity, sometimes needing more frequent feedings. They're often cheaper and have been the traditional method for centuries.
For beginners, freeze-dried starters offer reliability: the dormancy process is controlled and standardized for consistent results. My Rustic Roots starters use a 170+ year heritage culture.
Air-dried starters work just as well once activated but demand more patience in the first week.
Freeze-Dried Sourdough Starter Feeding Schedule and Ratios
Once activated, a consistent feeding schedule keeps the culture healthy and ready to bake. The most common ratio is 1:1:1 (starter to flour to water by weight), though some bakers adjust it to fit their schedule.
Here's the standard daily feeding approach:
| Feeding Ratio | Best For | Frequency | Notes |
|---|---|---|---|
| 1:1:1 | Daily baking | Once daily | Quick turnaround, starter doubles in 4-6 hours |
| 1:2:2 | Regular baking | Once daily | Slower rise, good for morning feedings |
| 1:5:5 | Weekly baking | Once weekly | Requires refrigeration between feedings |
The 1:1:1 ratio means equal weights of starter, flour, and water, such as 50g each. This feeding cycle roughly doubles your starter within 4-8 hours at room temperature.
If you bake weekly, use a 1:5:5 ratio and refrigerate between feedings. This slows fermentation so it needs feeding only once a week: pull it from the fridge, feed it, let it rise a few hours at room temperature, then bake.
Water type matters during maintenance as it did during activation. Filtered or spring water is ideal; chlorinated tap water won't ruin your starter but can slow fermentation slightly.
How Long to Activate Sourdough Starter and Readiness Signs
Activation typically spans 5-7 days, though some starters are ready by day 5. The timeline depends on room temperature, flour type, and water quality: warmer environments (72-75°F) speed activation, cooler ones (68-70°F) slow it.
Your starter is ready when it shows consistent, predictable activity: by day 5, a healthy freeze-dried starter should double within 4-8 hours after feeding, repeating reliably over several days.
Many bakers rush to bake too early. A starter that shows bubbles but doesn't reliably double is still developing, so give it another day or two of feedings.
According to food fermentation guides from university extension services, a starter is ready when it consistently reaches peak activity, maximum volume and bubble formation, at predictable intervals. This consistency is more important than the absolute number of days.
Purple Bag Organic Non-GMO Freeze-Dried Sourdough Starter – 12g San Francisco →
Signs Sourdough Starter Is Ready to Bake
Your freeze-dried starter is ready to bake when it meets these criteria:
- Predictable rising: The starter doubles in volume within 4-8 hours of feeding at room temperature
- Consistent bubbles: Bubbles appear throughout the mixture, not just on the surface
- Sour aroma: The smell is pleasantly tangy, not rotten or off-putting
- Passes the float test: A small spoonful of active starter floats in a glass of water (this indicates enough gas production)
- Visible activity: You can see the starter rise and fall over a 24-hour cycle
The float test is a practical check: at peak activity (usually 4-6 hours after feeding), drop a spoonful into room-temperature water. If it floats, gas production is strong enough to bake; if it sinks, give it more time.
Don't worry if it takes 7 or even 8 days. Freeze-dried starters build strength slowly rather than rush into activity, and that patience pays off with reliable baking results.
Troubleshooting Inactive Sourdough Starter
If your starter isn't showing expected activity by day 4 or 5, don't panic. Inactivity usually points to fixable issues: temperature, water quality, or flour type.
No Bubbles Appearing
No bubbles by day 4 usually means temperature. Fermentation slows dramatically below 68°F and nearly stops below 60°F. Check with a thermometer and, if cool, move the jar near (not touching) a radiator, atop the refrigerator, or into an oven with the light on.
Second, check your water. Chlorinated tap water inhibits fermentation, especially early on. Switch to filtered or spring water and repeat the feeding; activity should appear within 24-48 hours.
Third, verify your flour. Whole wheat and rye activate starters faster than white flour due to more nutrients. If you used all-purpose, try bread flour or add 10% whole wheat to the next feeding.
Slow or Weak Fermentation Activity
If you see bubbles but no reliable doubling, it's still developing. Continue daily feedings for 2-3 more days; weak activity often strengthens dramatically between days 6 and 8 as the yeast population builds.
Alternatively, increase your ratio: instead of 1:1:1, try 1:2:2 (one part starter to two parts flour and water). The extra food can speed visible activity.
Temperature affects speed too: a starter at 75°F shows activity faster than one at 70°F, so slight warmth helps in a cool environment.
Water and Temperature Issues
Use filtered or spring water throughout activation and maintenance. Chlorine won't kill your starter but slows fermentation; if tap water is your only option, let it sit uncovered 24 hours so the chlorine evaporates.
Keep room temperature between 68°F and 75°F for reliable activation. Below 68°F fermentation slows significantly; above 75°F the starter may over-activate, producing alcohol and vinegar flavors. If your home is cold, create a warm spot with an oven light, a low heating pad, or a warm corner near a heat source.
According to fermentation science resources, wild yeast fermentation rates roughly double for every 15°F increase in temperature, up to a point. This is why temperature control is critical during activation.
Common Mistakes to Avoid During Activation
First-time bakers make predictable mistakes that slow activation. Knowing these pitfalls helps you activate your freeze-dried starter smoothly.
Sealing the jar tightly: Your starter needs oxygen during activation. A sealed jar creates an anaerobic environment that slows fermentation.
Using chlorinated tap water: Chlorine inhibits wild yeast growth. Use filtered, spring, or bottled water. This single change often solves slow activation.
Feeding inconsistently: Skip a day or feed at irregular times, and your starter's rhythm breaks.
Discarding too much: Don't toss the whole mixture if there are no bubbles by day 3.
Impatience before day 5: Weak bubbles on day 4 aren't ready to bake.
Ignoring temperature: A cool kitchen is the #1 reason starters activate slowly. Use a thermometer and keep the jar at 70-75°F.
Switching flour types mid-activation: Consistency matters. Use the same flour throughout the first week.
Activating a freeze-dried sourdough starter removes the guesswork from sourdough baking. My Rustic Roots freeze-dried starters are designed for this exact purpose, to give you a proven foundation that activates reliably and delivers delicious bread. Sourdough fermentation best practices confirm that freeze-dried cultures offer consistent activation when temperature, water, and feeding schedules are controlled.
Frequently Asked Questions
How long does it take to activate a freeze-dried sourdough starter?
Most freeze-dried sourdough starters become active and ready to bake in 5-7 days. The timeline depends on room temperature, water quality, and feeding consistency. Warmer environments (70-75°F) speed up activation, while cooler rooms may take 7-10 days. You'll see visible bubbles and a pleasant sour aroma when your starter is ready.
What should you feed a rehydrated sourdough starter?
Feed your rehydrated starter with equal parts flour and filtered or purified water by weight. Start with a 1:1:1 ratio: 1 part starter, 1 part flour, 1 part water. Use unbleached all-purpose flour or bread flour for standard starters, or gluten-free flour if using a dedicated gluten-free culture. Feed once or twice daily during the first week, discarding half the mixture before each feeding. This maintains a healthy balance of wild yeast and lactic acid bacteria.
Why is my freeze-dried sourdough starter not bubbling?
Lack of bubbles usually stems from temperature, water quality, or inconsistent feeding. Ensure your starter is in a warm environment (68-75°F); cold slows fermentation significantly. Use filtered or purified water, as chlorine can inhibit wild yeast. Feed consistently every 12 hours and wait at least 24 hours after rehydration before expecting visible activity. If still inactive after 5 days, check that your jar has air circulation and isn't sealed too tightly. A small amount of activity may be hidden below the surface.
Can you use a freeze-dried sourdough starter straight from the package?
No, freeze-dried starters must be rehydrated and activated before use. The dehydrated culture is dormant to preserve shelf life. You need to reconstitute it with water and flour, then feed it for 5-7 days until it shows consistent bubbles, doubling, and a strong sour aroma. Only then is it strong enough to leaven bread reliably. Skipping reactivation will result in dense, gummy bread with little rise.