
Why Your Sourdough Bread Is Dense: Fixes That Work
Table of Contents
- Why Your Sourdough Bread Is Dense: The Root Causes
- How Sourdough Proofing Time Affects Density
- Dough Temperature and Ambient Humidity Matter More Than You Think
- Is Sourdough Bread Easier to Digest When It's Properly Fermented
- Essential Sourdough Baking Tools That Prevent Dense Bread
- Step-by-Step: Fixing Dense Sourdough Starting Today
- Frequently Asked Questions
Last Updated: October 4, 2026
Why Your Sourdough Bread Is Dense: The Root Causes
Dense sourdough bread is frustrating. You've followed the recipe, waited for fermentation, and still ended up with a tight crumb instead of those beautiful, open holes. The problem almost always traces back to one of three culprits: your starter isn't active enough, your fermentation timing is off, or your dough temperature isn't right.
The good news? Dense sourdough bread is fixable. Once you understand what's happening in your dough, you can adjust and get reliable results.
Underproofing vs. Overproofing
Underproofed dough lacks gas bubbles for an open crumb. The dough hasn't fermented long enough for wild yeast and lactic acid bacteria to produce enough CO2, resulting in weak oven spring.
Overproofed dough rises beautifully during bulk fermentation, but the gluten network weakens. When you score and bake, the dough collapses instead of rising, producing dense bread.
The poke test separates them: gently press your finger into the final proof dough. If the indent springs back immediately, you're underproofed. If it springs back slowly, you're in the sweet spot. If it doesn't spring back at all, you're overproofed.
Starter Activity and Strength
A weak starter is the silent killer of dense sourdough results. If your starter isn't doubling in size within 4-8 hours of feeding, it's not ready to leaven bread.
Many bakers use their starter straight from the fridge, which ferments slowly. Bring your starter to room temperature and feed it 1-2 times before baking. A mature starter should be bubbly and smell pleasantly sour, not acetone-like.
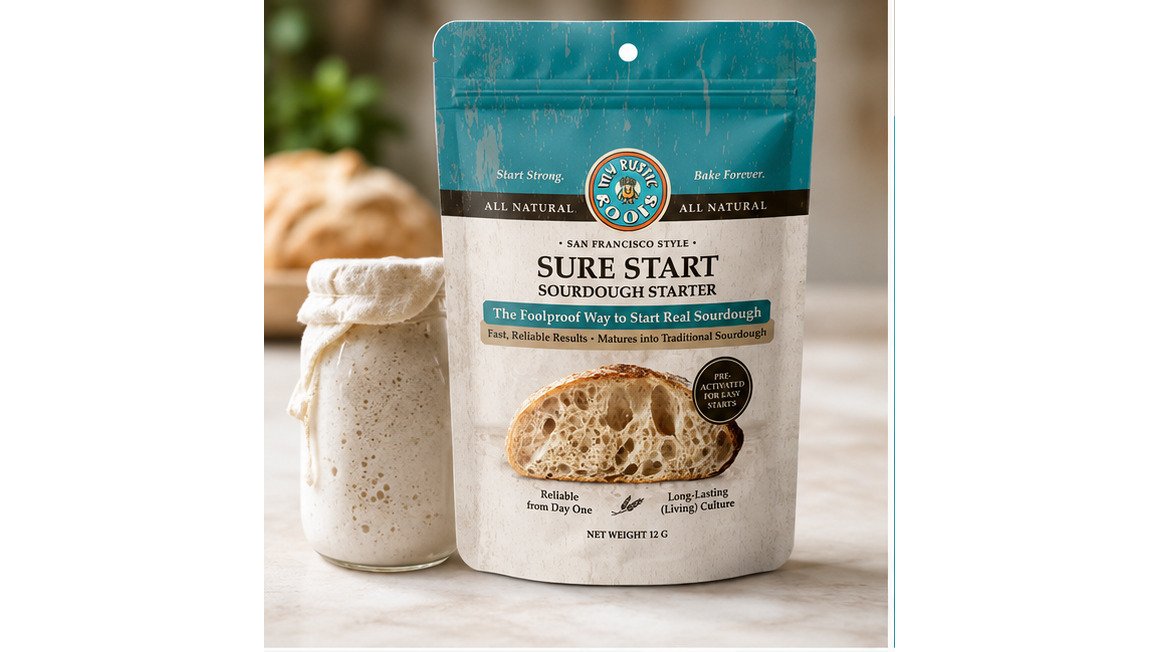
The USDA fermentation guidelines note that active fermentation depends on temperature and microbial balance. Our Purple Bag Organic Non-GMO Freeze-Dried Sourdough Starter comes from a 170+ year heritage culture and rehydrates into a strong, reliable starter. For beginners, the Sure Start Fail-Proof Sourdough Starter Culture includes potato flakes and probiotics to jump-start early fermentation activity.


Hydration Levels and Flour Protein Content
High hydration creates open crumb; low hydration creates tight crumb. Flour protein content changes everything.
Bread flour (12-14% protein) handles high hydration better than all-purpose flour (10-12% protein). If using all-purpose flour at 80% hydration, reduce to 75% or switch to bread flour.
Whole wheat flour adds bran, which cuts gluten strands. If your recipe calls for 20% whole wheat, reduce total hydration by 2-3%.
How Sourdough Proofing Time Affects Density
Proofing time determines fermentation. Too short, and your dough lacks gas; too long, and gluten breaks down. The timeline depends on starter strength, dough temperature, and ambient temperature.
Bulk Fermentation Duration
Bulk fermentation is the first rise, where most gas production happens. A typical bulk fermentation lasts 4-6 hours at room temperature (68-72°F), or 3-4 hours in warmer kitchens (75-78°F).
Look for visible bubbles and a 50-75% volume increase. If you're skipping this visual check and just watching the clock, you're guessing.
Cold fermentation (retarding overnight) slows bulk fermentation and builds flavor, but your final proof happens in cold dough. Allow extra time at room temperature before baking to avoid underproofing.
Final Proof and Poke Test Method
The final proof is the second rise after shaping, typically 2-4 hours at room temperature or 8-16 hours in the fridge. Use the poke test as your guide.
Press your finger gently into the shaped dough. If the indent springs back in 1-2 seconds, it needs more time. If it springs back slowly over 5-10 seconds, it's perfect. If it doesn't spring back, it's overproofed.
Room temperature, humidity, and starter strength all affect final proof timing. Only the poke test tells you when to bake.
| Poke Test Result | Fermentation Status | Action |
|---|---|---|
| Springs back immediately | Underproofed | Let it rise longer |
| Springs back slowly (5-10 sec) | Perfect | Ready to bake |
| Doesn't spring back | Overproofed | Bake immediately or reshape |
Dough Temperature and Ambient Humidity Matter More Than You Think
Dough temperature and ambient humidity are the two environmental variables that most directly control fermentation speed. Humidity changes can shift your fermentation timeline by 30-60 minutes without any change to your starter, flour, or recipe.
Dough Temperature: The Primary Control
Dough temperature controls fermentation speed more predictably than any other factor. Yeast and bacteria activity roughly doubles for every 18°F (10°C) increase in temperature, within 50-85°F.
Target dough temperature is 75-78°F for bulk fermentation of 4-6 hours and final proof of 2-4 hours. Below 70°F, fermentation slows; above 82°F, it accelerates but risks overproofing.
To hit your target dough temperature, adjust your water temperature based on your kitchen conditions:
Formula: Desired dough temperature × 3 − (room temperature + flour temperature) = target water temperature
Example: You want 76°F dough. Your kitchen is 68°F, and your flour is 70°F.
76 × 3 = 228 228 − (68 + 70) = 228 − 138 = 90°F water temperature
Use a kitchen thermometer to measure your water before mixing. This single adjustment removes the guesswork from fermentation timing. A dough at 76°F will ferment predictably; a dough at 72°F will ferment 1-2 hours slower, and you may mistake underproofing for a weak starter.
Ambient Humidity: The Overlooked Variable
Ambient humidity directly affects how your dough behaves during fermentation and proofing.
Low humidity (below 40%): Dry air pulls moisture from your dough's surface, forming a skin that blocks gas escape and slows surface fermentation.
Purple Bag Organic Non-GMO Freeze-Dried Sourdough Starter – 12g San Francisco →
Solution: Cover your bulk fermentation bowl with a damp cloth or plastic wrap.
Moderate humidity (40-60%): This is the "Goldilocks" range. Fermentation proceeds predictably, and your dough surface stays supple without becoming sticky. Most published sourdough recipes assume this humidity range.
High humidity (above 60%): Moist air slows evaporation, making fermentation appear to accelerate. Bulk fermentation may finish 20-40 minutes earlier than expected, and overproofing risk increases.
Solution: Reduce your fermentation times by 15-30 minutes. Use less water in your dough (reduce hydration by 2-3%) if you're in a persistently humid climate.
Seasonal Humidity Shifts
Humidity varies by season: Winter (20-35%) slows fermentation and causes surface drying. Spring/Fall (40-55%) is ideal. Summer (above 70%) accelerates fermentation and makes dough sticky.
If your sourdough is consistently dense in winter but open in summer, humidity is the culprit. Winter's dry air slows surface fermentation.
Diagnostic: Track Humidity and Timing
For two weeks, record ambient humidity (use a $10-15 digital hygrometer), bulk fermentation time, and final proof time. You'll see a clear pattern: higher humidity = shorter fermentation times.
Once you see the pattern, adjust proactively. In winter, increase bulk fermentation by 30-60 minutes and cover your dough carefully. In summer, reduce bulk fermentation by 20-30 minutes.
Is Sourdough Bread Easier to Digest When It's Properly Fermented
Proper fermentation breaks down starches and gluten, producing a more digestible loaf.
Research from food science journals on fermentation shows that sourdough fermentation reduces phytic acid, which binds minerals. A properly fermented sourdough (18-24 hours total fermentation) has lower phytic acid than commercial yeast bread.
Dense sourdough bread hasn't fermented properly. If your crumb is tight, fermentation was cut short and you lose digestibility benefits.
Essential Sourdough Baking Tools That Prevent Dense Bread
The right tools help you read your dough correctly. A kitchen scale ensures accurate hydration ratios. A thermometer tells you if your dough temperature is in the sweet spot. A banneton (proofing basket) supports your dough during final proof without overproofing it.
A dough scraper helps you perform stretch and fold during bulk fermentation, building gluten strength without overworking the dough. A Dutch oven traps steam during the first 20 minutes of baking, allowing maximum oven spring.
My Rustic Roots offers essential baking tools designed to support consistent results. Our bread slings and dough whisks help you handle wet dough confidently. Paired with a reliable starter like our Organic Mature Sourdough Starter, you have the foundation for open-crumb sourdough.

Step-by-Step: Fixing Dense Sourdough Starting Today
Assess Your Starter's Activity Level
Feed your starter and observe what happens over the next 8 hours. A healthy starter doubles in volume and becomes bubbly. It smells pleasantly sour, not like acetone or gym socks.
If your starter is sluggish, it's likely too cold or underfed. Move it to a warmer spot (75-78°F) and feed it twice daily for 3-5 days.
If you're starting fresh, the Sure Start Fail-Proof Sourdough Starter Culture is designed for fast activation. It includes probiotics and potato flakes to support early fermentation while your wild yeast population builds.
Adjust Your Fermentation Timeline
Measure your kitchen temperature. If it's below 70°F, increase bulk fermentation time by 1-2 hours. If it's above 78°F, reduce bulk fermentation by 30-60 minutes.
Use the visual cues, not the clock:
- Bulk fermentation: dough should show visible bubbles and increase 50-75% in volume
- Final proof: use the poke test to determine readiness
Keep a simple log for two weeks. Note your kitchen temperature, bulk fermentation time, final proof time, and the result. Patterns emerge fast. You'll see exactly how your kitchen's conditions affect your timeline.
Monitor Oven Spring and Scoring Technique
Oven spring is the rapid rise that happens in the first 10-15 minutes of baking. If your sourdough bread is dense, oven spring is weak. This signals underproofing or a weak gluten network.
Score your dough with confidence. A sharp blade at a 30-45 degree angle, about 1/4 inch deep. The score guides where the dough expands. A hesitant or shallow score doesn't open properly, trapping gas inside.
Bake in a preheated Dutch oven at 500°F for 20 minutes covered (trapping steam). Then uncover and bake at 450°F for 25-30 minutes until deep brown. The steam in the first phase is critical for oven spring.
Dense sourdough bread stops when you understand fermentation. Your starter needs to be active and well-fed. Your dough temperature should sit at 75-78°F.
My Rustic Roots helps you master these fundamentals with a reliable starter and quality tools. Start with the Purple Bag Organic Non-GMO Freeze-Dried Sourdough Starter or the beginner-friendly Sure Start Fail-Proof Sourdough Starter Culture, then dial in your fermentation timeline.
Frequently Asked Questions
How do I know if my sourdough bread is underproofed or overproofed?
Underproofed sourdough has a dense, gummy crumb with minimal oven spring and a thick crust. Overproofed bread spreads flat, lacks structure, and may collapse during baking. Use the poke test: gently press the dough during final proof. If it springs back immediately, it's underproofed. If the indent stays, it's ready. If it deflates, it's overproofed. Ambient temperature and starter activity both affect proofing speed, so timing varies.
Why is my sourdough bread easier to digest when it's properly fermented?
Extended fermentation allows wild yeast and lactic acid bacteria to break down starches and proteins, reducing gluten density and improving nutrient availability. This process also produces organic acids that aid digestion. Properly fermented sourdough with a strong, active starter develops better crumb structure, allowing your digestive system to process it more easily than dense, underproofed bread.
What's the best sourdough proofing time for an open crumb?
Bulk fermentation typically takes 4-6 hours at 75°F, though this varies with starter activity and ambient temperature. Final proof ranges from 2-4 hours at room temperature or 8-16 hours cold retarding in the refrigerator. Cold retarding actually improves flavor and crumb structure. The key is watching your dough, not the clock, look for 50-75% volume increase during bulk fermentation and a responsive poke test during final proof.
Do I really need special sourdough baking tools to avoid dense bread?
You don't need expensive equipment, but the right sourdough baking tools make a measurable difference. A Dutch oven traps steam for better oven spring, a bench scraper helps develop gluten through stretch and fold, and a banneton supports proper dough strength during proofing. A kitchen scale ensures accurate hydration ratios. These tools cost little but directly prevent common mistakes that cause dense crumb.