
How Do You Use a Bread Sling for Sourdough?
Last Updated: November 2, 2026
Quick Summary
A bread sling is a flat, flexible sheet with handles on each side, used to lift shaped sourdough dough into a hot Dutch oven without deforming it. Place the dough on the sling, score it on the counter, then lower it straight into the preheated pot.
- Silicone slings are non-stick, easy to clean, and heat and cold resistant.
- Our 2-arm bread slings are listed to fit round Dutch ovens between 7 and 8.5 inches across.
- Score the dough on the sling on the counter so the blade never travels over hot metal.
- Preheat the Dutch oven, lid on, for at least 45 minutes at your recipe's baking temperature.
- Check the sling's temperature rating and that its handles clear the lid before baking.
Table of Contents
- How to Use a Silicone Bread Sling Step by Step
- How to Transfer Sourdough Dough to a Dutch Oven Without Deflating It
- Bread Sling vs Parchment Paper for Sourdough: Which Works Better?
- Removing Baked Bread and Staying Safe From Hot Cookware
- Troubleshooting Sticking, Folds and Pale Bottoms
- Cleaning and Storing Your Silicone Bread Sling
- Choosing Your Next Sling for Your Dutch Oven
- Frequently Asked Questions
A bread sling is a flat, flexible sheet with handles on each side, used to lift shaped sourdough dough into a hot Dutch oven without deforming it. You can browse our full range of bread slings to compare handle layouts and sizes. At My Rustic Roots, we offer bread slings made from silicone, including a 2-arm design.
Our slings are made from silicone, which has a non-stick surface, is easy to clean, and is heat and cold resistant. The 2-arm design uses two handles on opposite sides, so you can hold the sling steady while you lower your dough. The handles also help keep your fingers away from the hot pot.
Our 2-arm bread slings are listed to fit round Dutch ovens between 7 and 8.5 inches across. Measure your pot before you buy, because a sling that is too large will hang over the sides and a sling that is too small will not give you enough grip.
- Material: Food-grade silicone
- Surface: Non-stick
- Cleanup: Wipe clean or rinse
- Fit: Round Dutch ovens, 7 to 8.5 inches
- Handles: Two arms for lifting and lowering
How to Use a Silicone Bread Sling Step by Step
Using a sling is a sequence, not a single move. Here is the full workflow, from proofing basket to cooling rack.
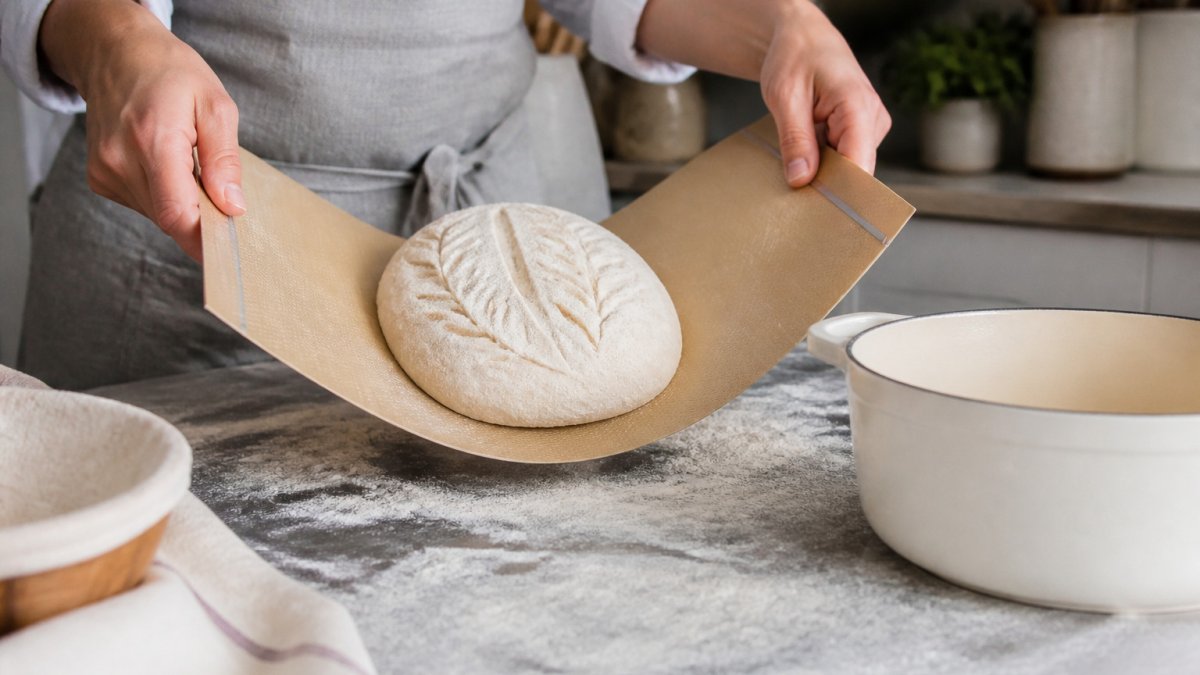
Step 1: Set Up the Sling Before the Dough Is Ready
Lay the sling flat on a clean, dry counter or a sheet pan. If your dough is sticky or high-hydration, dust the sling lightly with flour. For more fixes, see guide to improving sourdough crust.
Check the fit now, not when the pot is hot. The sling should sit flat with both handles clear of the surface. If the handles flop over the edge of your counter, move the sling to a sheet pan so you can lift it cleanly later.
Step 2: Release the Dough From the Proofing Basket
Take the dough out of the refrigerator if you cold-proof. Turn the basket over onto the center of the sling and let gravity do the work. If the dough resists, tap the basket gently rather than pulling, pulling stretches the surface and can deflate the loaf.
Set the dough seam side down on the sling. If your recipe calls for seam side up, follow the recipe; the sling does not care which way the seam faces, but the dough should sit centered so the loaf does not tilt when you lift.
Step 3: Score on the Sling, Not Over the Pot
Score the dough while it is still on the sling and still on the counter. Score the dough on the counter before lifting it into the pot. A single decisive slash or your usual pattern is fine, the point is that the blade never has to travel over hot metal.
Step 4: Preheat the Dutch Oven Fully
Preheat the Dutch oven, with the lid on, for at least 45 minutes at your recipe's baking temperature. Most sourdough bakes run between 450°F and 500°F. Preheating the pot fully is part of the standard baking method for this kind of loaf.
Step 5: Lower the Dough Straight Down
Grip both handles evenly. Lift the sling and move it over the pot in one continuous motion, no stopping halfway. Lower the dough straight down until the sling rests flat against the bottom of the pot.
Lower the sling, tilt it slightly toward one handle, and slide it out in one smooth motion so the dough settles in the center.
Step 6: Lid On, Then Lid Off
Put the lid on and bake covered for the first portion of the bake, typically 20 to 25 minutes, so the steam stays trapped and the crust sets. Then remove the lid and finish uncovered, usually another 20 to 25 minutes, until the crust is deep brown.
Check your product instructions before leaving the sling under the loaf during the uncovered phase, and follow the manufacturer's temperature rating.
Step 7: Unload and Cool
When the bake is done, put on oven mitts and lift the loaf out by the sling handles if the sling is still in the pot. If you removed the sling before the uncovered phase, tilt the pot and slide the loaf onto a wire rack with a spatula or a pair of tongs.
Set the hot Dutch oven on a heat-safe trivet. Let the loaf cool on a wire rack.
How to Transfer Sourdough Dough to a Dutch Oven Without Deflating It
The biggest risk during transfer is losing the gas your dough has built up over the final proof. Work quickly but calmly, and avoid pressing on the loaf.
Keep your hands light on the sling. Lift from both handles evenly, and move the dough in one continuous motion. Stopping halfway through can cause the loaf to fold or flatten.
If your dough is very wet, chill it for 15 to 20 minutes before transfer. Firmer dough holds its shape better on the sling.
Bread Sling vs Parchment Paper for Sourdough: Which Works Better?
Both tools get dough into a hot pot. The difference is what they are made of, how they behave at baking temperature, and how much control you get during the transfer.
Bread Sling 2-Arm Design (2 pack) →
Material and Heat Behavior
Silicone slings are made from food-grade silicone, which is flexible, non-stick, and rated by the manufacturer for a specific temperature range. Check the temperature rating in your product instructions before baking at higher temperatures.
Parchment paper is paper treated to resist grease and moisture. Its heat tolerance varies, so check the rating on the package before using it at high temperatures.
Control During Transfer
A sling gives you rigid handles and a flat, sturdy base. You lift from two points, lower straight down, and slide the sling out. The handles are the whole point: they keep your hands away from the hot pot and let you move the dough in one motion.
Parchment gives you a flat sheet with no handles. You lift it by the corners, which works, but the paper can fold or tear under a wet dough.
Fit and Lid Interference
This is the trade-off most comparisons miss. A sling with long handles can interfere with the Dutch oven lid if the handles drape over the rim. Check that the handles clear the lid before you close it, or fold them down inside the pot if your sling allows it. If you are weighing your next tool, see essential sourdough baking tools for an overview of your options. Parchment has no handles, so lid interference is not an issue, but the paper edges can stick out and scorch against the lid.
Cost and Lifecycle
Parchment is disposable, while a silicone sling is reusable with proper care.
When Parchment Wins
Parchment can be a simpler option when you bake above your sling's temperature rating or in a pot shape your sling does not fit.
When a Sling Wins
A sling can be useful for handling wetter dough and for keeping your hands away from a hot pot. Learning how to use a silicone bread sling for sourdough gives you a reusable tool that you will likely keep for years, provided you respect its temperature rating.
The two tools differ in material, transfer control, lid fit, and cost, as summarised below.
| Factor | Silicone bread sling | Parchment paper |
|---|---|---|
| Material | Food-grade silicone | Grease- and moisture-resistant paper |
| Heat behavior | Check manufacturer's temperature rating | Varies; check package rating |
| Transfer control | Two handles, lower straight down | Flat sheet, lift by corners |
| Lid interference | Long handles can drape over rim | Paper edges may scorch against lid |
| Cost and lifecycle | Reusable with proper care | Disposable |
Removing Baked Bread and Staying Safe From Hot Cookware
Once the bake is done, use oven mitts and lift the loaf out with the sling still under it, if your sling is still in the pot. Many bakers leave the sling in during the uncovered portion of the bake, so check whether yours is positioned for removal.
Handle the Dutch oven lid and body as hot cookware throughout. Set the pot on a heat-safe trivet, never directly on a counter. Let the loaf cool on a wire rack so the bottom does not steam and go soft.
Watch out: Let everything cool before you wash it.
Troubleshooting Sticking, Folds and Pale Bottoms
Most problems come down to flour, timing, or preheating.
- Dough sticks to the sling: Add a light dusting of flour, or use a little rice flour for a drier surface.
- Sling folds under the loaf: Smooth it flat before you add the dough, and keep the dough centered.
- Pale bottom crust: Make sure the Dutch oven preheats long enough, and bake covered for the first portion of the bake.
- Loaf deflates on transfer: Work faster and avoid pressing. Chill the dough briefly if it is very wet.
Cleaning and Storing Your Silicone Bread Sling
Wash the sling in warm, soapy water after each use, then let it air dry flat. Flour and dough residue can build up in the corners if you skip cleaning.
Store it flat or loosely rolled, away from sharp edges and direct heat.
Choosing Your Next Sling for Your Dutch Oven
If you bake in a round Dutch oven, the 2-arm design fits pots between 7 and 8.5 inches. Our 2-arm bread slings come in a 2-pack for $14.95.
If you want a different handle layout, our 4-arm bread sling 2-pack is priced at $18.95.
Check your Dutch oven's diameter first. Then pick the sling that fits, and start your next loaf with a tool made to lift it safely.
Frequently Asked Questions
How do you use a bread sling for sourdough?
Place the sling flat on your counter, center your shaped dough on it, and use the handles to lift the dough. Lower it into a preheated Dutch oven, letting the sling rest against the pot walls so you can release the loaf. Cover the pot and bake as your recipe directs. The handles help keep your fingers away from the hot sides.
Can you use a silicone bread sling in a Dutch oven?
Yes. Silicone bread slings are designed for use in hot pots and pans, and the listings for the My Rustic Roots 2-Arm and 4-Arm slings state they are heat and cold resistant and fit round Dutch ovens in the 7 to 8.5 inch range. Check that your pot falls within the sling's listed size before you use it, and follow the product instructions for maximum temperature. Lift the sling out gently once the bread is ready, and use oven mitts when handling the hot pot.
Do you need to flour a bread sling before using it?
Our silicone slings have a non-stick surface. Use a light dusting of flour if your dough sticks.
Can you use parchment paper instead of a bread sling?
Parchment paper can work for lowering dough into a Dutch oven and is single-use. Our reusable silicone slings have handles for lifting and lowering. Choose based on how often you bake.
